Go home
Go back to other tutorials
HMG Tutorial
Giovanni Di Maria - calimero22@yahoo.it
since: May 5, 2013
Tutorial
This Tutorial:
Rev. [1] - May 5, 2013
Rev. [136] - May 27, 2013

Index
| News and latest updates |
|---|
| ACTIVEX - Viewing a Web page |
| ACTIVEX - Viewing a PDF document |
| ACTIVEX - Viewing a movie from Youtube |
| ACTIVEX - Viewing two movies from Youtube |
| ACTIVEX - Playing a WAV file |
| OLE - Creating an Excel document |
| OLE - Creating a Word document |
Record of Revision
| Revision | Date |
|---|
| 1 | May 5, 2013 |
Introduction
This tutorial is a brief, continuously updated, of the use of HMG.
It is specifically written for beginners that initially encountered some difficulties in using
classes, however, extremely powerful and efficient.
The approach of the tutorial is different from other guides that are online.
It simply focuses a single class or single object, so you do not get lost in the
maze of the vast files of examples provided with the product.
This will easily learn to manage and plan their individual class, as needed, and, finally,
to put "together" the whole.
Giovanni Di Maria
Legal Notices
This tutorial is a free document and will remain free. You can view, use, print and
redistribute it and/or modify it, without any limitations.
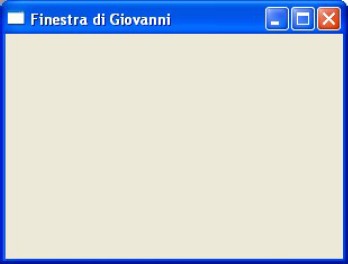
WINDOW - Window
The following example shows how to create a simple main window. The window is resizable.
#INCLUDE "hmg.ch"
FUNCTION Main()
DEFINE WINDOW Form_1 ;
AT 90,90 ;
WIDTH 300 ;
HEIGHT 200 ;
TITLE "Finestra di Giovanni" ;
MAIN
END WINDOW
Form_1.Activate
RETURN NIL
WINDOW - Window not resizable
The following example shows how to create a simple main window. The window is NOT resizable.
#include "hmg.ch"
FUNCTION Main()
DEFINE WINDOW Form_1 ;
AT 90,90 ;
WIDTH 200 ;
HEIGHT 200 ;
TITLE "Finestra di Giovanni" ;
NOSIZE ;
MAIN
END WINDOW
Form_1.Activate
RETURN NIL
WINDOW - Blinking Title Bar
The following example shows how to create a blinking title bar.
#include "hmg.ch"
FUNCTION Main()
DEFINE WINDOW Form_1 ;
AT 90,90 ;
WIDTH 300 ;
HEIGHT 200 ;
TITLE "Finestra di Giovanni" ;
MAIN
END WINDOW
DEFINE TIMER tempo PARENT Form_1 ;
INTERVAL 500 ;
ACTION Blink()
Form_1.Activate
RETURN NIL
FUNCTION Blink()
IF Form_1.title == "Finestra di Giovanni"
Form_1.title := ""
ELSE
Form_1.title := "Finestra di Giovanni"
ENDIF
RETURN NIL
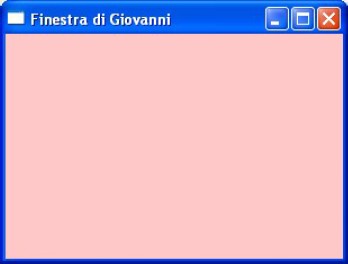
WINDOW - Colored Window
The following example shows how to create a colored main window.
#include "hmg.ch"
FUNCTION Main()
DEFINE WINDOW Form_1 ;
AT 90,90 ;
WIDTH 300 ;
HEIGHT 200 ;
TITLE "Finestra di Giovanni" ;
BACKCOLOR { 255 , 200 , 200 } ;
MAIN
END WINDOW
Form_1.Activate
RETURN NIL
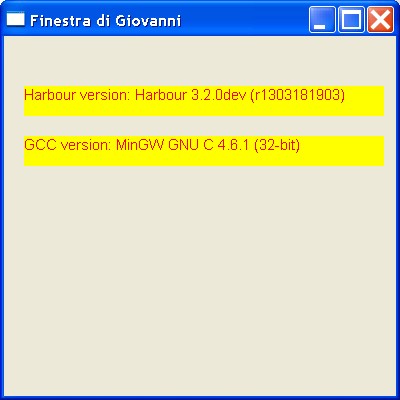
WINDOW - Retrieve version of Harbour and GCC
The following example shows how to retrieve informations from compilers used.
#include "hbver.ch"
#include "hmg.ch"
FUNCTION Main()
LOCAL cVersion1, cVersion2
DEFINE WINDOW Form_1 ;
AT 90,90 ;
WIDTH 400 ;
HEIGHT 400 ;
TITLE "Finestra di Giovanni" ;
MAIN
END WINDOW
cVersion1 := hb_Version ( HB_VERSION_HARBOUR )
cVersion2 := hb_Version ( HB_VERSION_COMPILER )
@ 50, 20 LABEL oLabel1 PARENT Form_1 ;
WIDTH 360 ;
HEIGHT 30 ;
BACKCOLOR { 255, 255, 0} ;
FONTCOLOR { 255, 0, 0} ;
VALUE "Harbour version: " + cVersion1
@ 100, 20 LABEL oLabel2 PARENT Form_1 ;
WIDTH 360 ;
HEIGHT 30 ;
BACKCOLOR { 255, 255, 0} ;
FONTCOLOR { 255, 0, 0} ;
VALUE "GCC version: " + cVersion2
Form_1.Activate
RETURN NIL
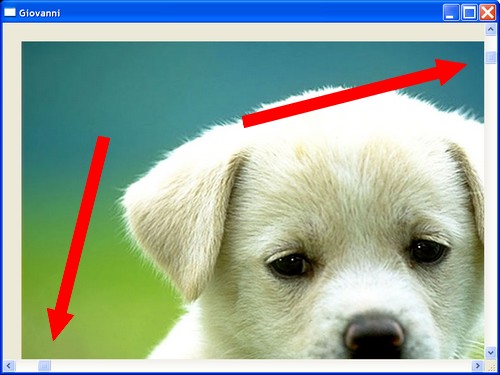
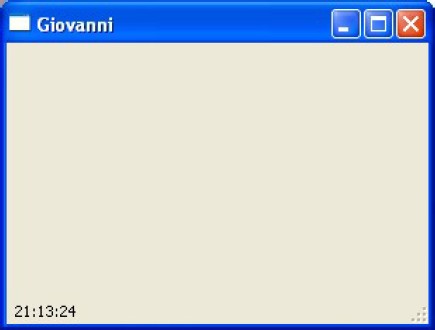
WINDOW - Virtual Size
The following example shows how to create a big window with scrolling bars.
#include "hmg.ch"
FUNCTION Main()
DEFINE WINDOW Form_1 ;
AT 90,90 ;
WIDTH 800 ;
HEIGHT 600 ;
VIRTUAL WIDTH 1200 ;
VIRTUAL HEIGHT 1000 ;
TITLE "Giovanni" ;
MAIN
END WINDOW
@ 50,50 IMAGE foto ;
PARENT Form_1 ;
PICTURE "dog.jpg" ;
WIDTH 1024 ;
HEIGHT 768
ACTIVATE WINDOW Form_1
RETURN NIL
ICON - Window with Icon
The following example shows how to add an icon to a form.
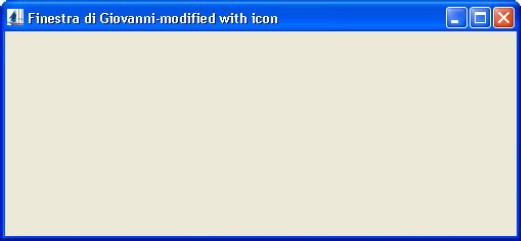
#include "hmg.ch"
FUNCTION Main()
DEFINE WINDOW Form_1 ;
AT 90,90 ;
WIDTH 500 ;
HEIGHT 200 ;
TITLE "Finestra di Giovanni with icon" ;
ICON "hmg.ico" ;
MAIN
END WINDOW
Form_1.Activate
RETURN NIL
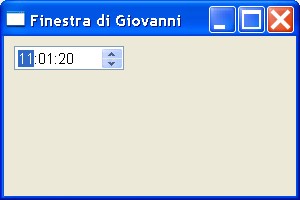
DATEPICKER - Editing a date
The following example shows how to enter and edit a date.
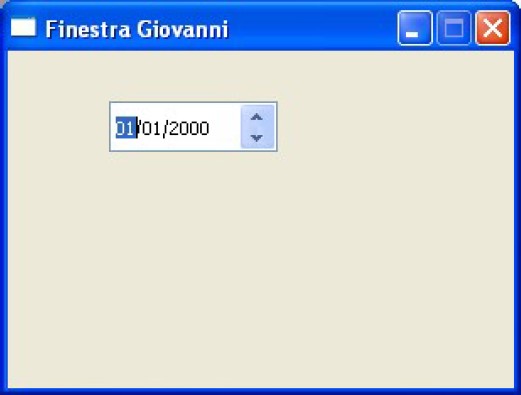
#include "hmg.ch"
FUNCTION Main()
DEFINE WINDOW Form_1 ;
AT 90,90 ;
WIDTH 300 ;
HEIGHT 200 ;
TITLE "Finestra Giovanni" ;
MAIN
END WINDOW
@ 30, 60 DATEPICKER data PARENT Form_1
Form_1.Activate
RETURN NIL
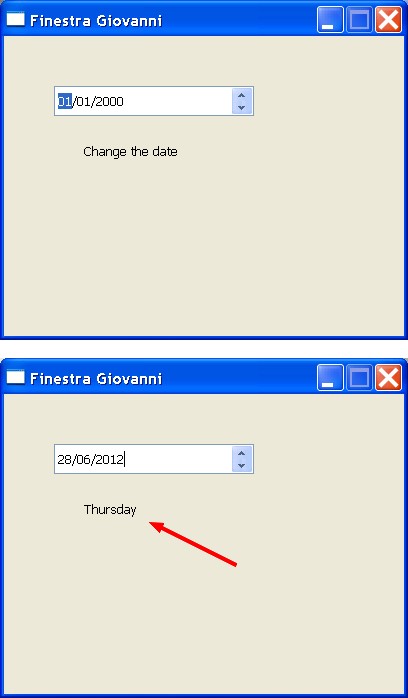
DATEPICKER - Editing a date and displaying the week day
The following example shows how to enter and edit a date. The program
shows also the week day of the date.
#include "hmg.ch"
FUNCTION Main()
SET DATE ITALIAN
DEFINE WINDOW Form_1 ;
AT 90,90 ;
WIDTH 400 ;
HEIGHT 300 ;
TITLE "Finestra Giovanni" ;
MAIN
END WINDOW
@ 50, 50 DATEPICKER date ;
PARENT Form_1 ;
ON CHANGE show_day()
@ 100, 80 LABEL day ;
PARENT Form_1 ;
VALUE "Change the date" ;
WIDTH 200 ;
HEIGHT 30
Form_1.Activate
RETURN NIL
FUNCTION show_day()
Form_1.day.value := CDOW( Form_1.date.value )
RETURN NIL
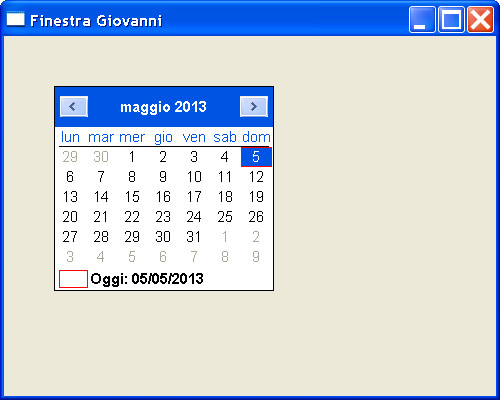
MONTHCALENDAR - Simple Calendar
The following example shows how to create a simple window containing a calendar.
#include "hmg.ch"
FUNCTION Main()
DEFINE WINDOW Form_1 ;
AT 90,90 ;
WIDTH 500 ;
HEIGHT 400 ;
TITLE "Finestra Giovanni" ;
MAIN
END WINDOW
@ 50,50 MONTHCALENDAR Calendario ;
PARENT Form_1
Form_1.Activate
RETURN NIL
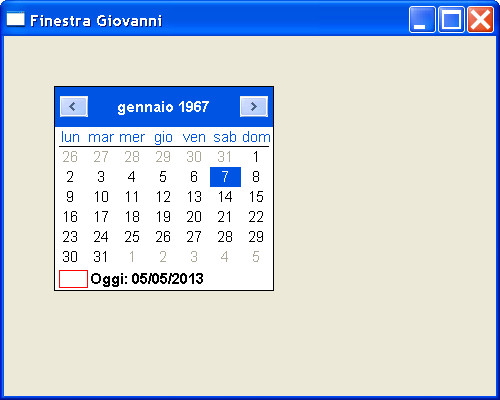
MONTHCALENDAR - Setting a date
This example shows how to set any date in the calendar.
#include "hmg.ch"
FUNCTION Main()
SET DATE ITALIAN
DEFINE WINDOW Form_1 ;
AT 90,90 ;
WIDTH 500 ;
HEIGHT 400 ;
TITLE "Finestra Giovanni" ;
MAIN
END WINDOW
@ 50,50 MONTHCALENDAR Calendario ;
PARENT Form_1 ;
VALUE CTOD( "07/01/1967" )
Form_1.Activate
RETURN NIL
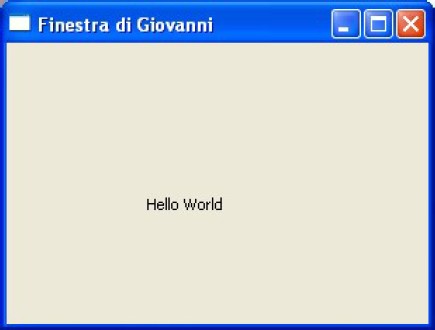
LABEL - Text Label
The following example shows how to create a simple main window with a label, used
as text string.
#include "hmg.ch"
FUNCTION Main()
DEFINE WINDOW Form_1 ;
AT 90,90 ;
WIDTH 300 ;
HEIGHT 300 ;
TITLE "Finestra di Giovanni" ;
MAIN
END WINDOW
@ 100, 100 LABEL Hello ;
PARENT Form_1 ;
VALUE "Hello World"
Form_1.Activate
RETURN NIL
LABEL - Colored Label
The following example shows how to create a simple main window with a colored label.
#include "hmg.ch"
FUNCTION Main()
DEFINE WINDOW Form_1 ;
AT 90,90 ;
WIDTH 300 ;
HEIGHT 200 ;
TITLE "Finestra di Giovanni" ;
MAIN
END WINDOW
@ 100, 100 LABEL Hello ;
PARENT Form_1 ;
VALUE "Hello World" ;
FONTCOLOR { 255, 0, 0 }
Form_1.Activate
RETURN NIL
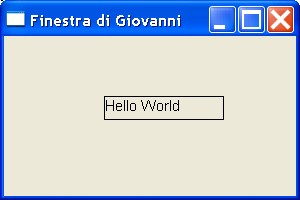
LABEL - Setting a border
The following example shows how to set the border of the labels.
#include "hmg.ch"
FUNCTION Main()
DEFINE WINDOW Form_1 ;
AT 90,90 ;
WIDTH 300 ;
HEIGHT 200 ;
TITLE "Finestra di Giovanni" ;
MAIN
END WINDOW
@ 60, 100 LABEL Hello ;
PARENT Form_1 ;
VALUE "Hello World" ;
BORDER
Form_1.Activate
RETURN NIL
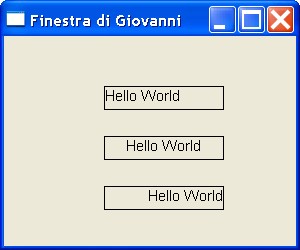
LABEL - Alignment
The following example shows how to align a text in a Label.
#include "hmg.ch"
FUNCTION Main()
DEFINE WINDOW Form_1 ;
AT 90,90 ;
WIDTH 300 ;
HEIGHT 250 ;
TITLE "Finestra di Giovanni" ;
MAIN
END WINDOW
@ 050, 100 LABEL Hello1 ;
PARENT Form_1 ;
VALUE "Hello World" ;
BORDER
@ 100, 100 LABEL Hello2 ;
PARENT Form_1 ;
VALUE "Hello World" ;
BORDER ;
CENTERALIGN
@ 150, 100 LABEL Hello3 ;
PARENT Form_1 ;
VALUE "Hello World" ;
BORDER ;
RIGHTALIGN
Form_1.Activate
RETURN NIL
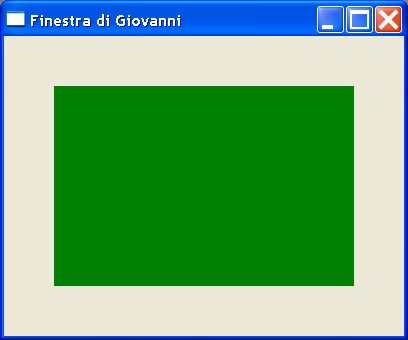
LABEL - Rectangle
The following example shows how to create a green rectangle with a Label.
#include "hmg.ch"
FUNCTION Main()
DEFINE WINDOW Form_1 ;
AT 90,90 ;
WIDTH 400 ;
HEIGHT 300 ;
TITLE "Finestra di Giovanni" ;
MAIN
END WINDOW
@ 50, 50 LABEL Hello ;
PARENT Form_1 ;
WIDTH 300 ;
HEIGHT 200 ;
BACKCOLOR { 0, 128, 0 }
Form_1.Activate
RETURN NIL
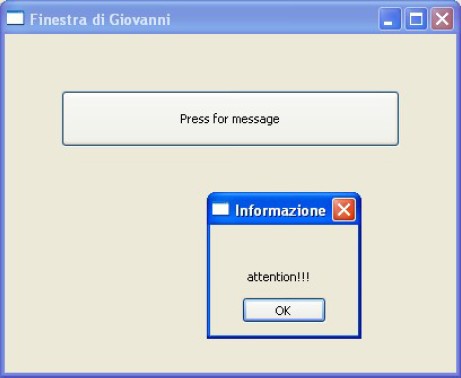
MSGBOX - Message Box (simple)
The following example shows how to create a simple window with an active button.
If the button is pressed, a message box appears.
#include "hmg.ch"
FUNCTION Main()
DEFINE WINDOW Form_1 ;
AT 90,90 ;
WIDTH 400 ;
HEIGHT 300 ;
TITLE "Finestra di Giovanni" ;
MAIN
END WINDOW
@ 50, 50 BUTTON button ;
PARENT Form_1 ;
CAPTION "Press for message" ;
WIDTH 300 ;
HEIGHT 50 ;
ONCLICK MsgBox( "attention!!! " , "Informazione" )
Form_1.Activate
RETURN NIL
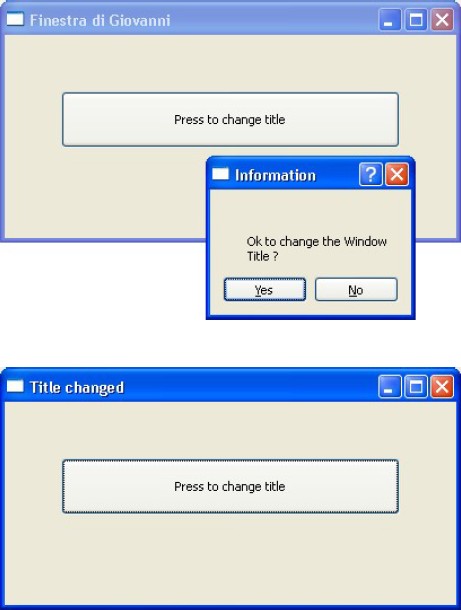
MSGYESNO - Message Box (Yes and No buttons)
The following example shows how to create a simple window with the Yes and No button.
If the Yes button is pressed, the window title will change.
#include "hmg.ch"
FUNCTION Main()
DEFINE WINDOW Form_1 ;
AT 90,90 ;
WIDTH 400 ;
HEIGHT 180 ;
TITLE "Finestra di Giovanni" ;
MAIN
END WINDOW
@ 50, 50 BUTTON button ;
PARENT Form_1 ;
CAPTION "Press to change title" ;
WIDTH 300 ;
HEIGHT 50 ;
ONCLICK Pressed()
Form_1.Activate
RETURN NIL
FUNCTION Pressed()
LOCAL lResponse
lResponse := MsgYesNo( "Ok to change the Window Title ?" , "Information" )
IF lResponse
Form_1.title := "Title changed"
ENDIF
RETURN NIL
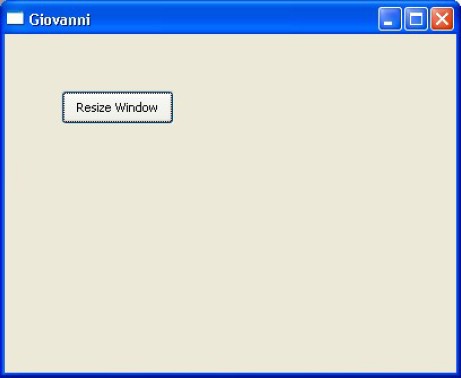
BUTTON - Simple button
The following example shows how to create a simple button. If pressed, the window will be resized.
#include "hmg.ch"
FUNCTION Main()
DEFINE WINDOW Form_1 ;
AT 90,90 ;
WIDTH 400 ;
HEIGHT 300 ;
TITLE "Giovanni" ;
MAIN
END WINDOW
@ 50, 50 BUTTON button ;
PARENT Form_1 ;
CAPTION "Resize Window" ;
WIDTH 150 ;
HEIGHT 50 ;
ONCLICK Pressed()
Form_1.Activate
RETURN NIL
FUNCTION Pressed()
Form_1.width := 500
Form_1.height := 400
RETURN NIL
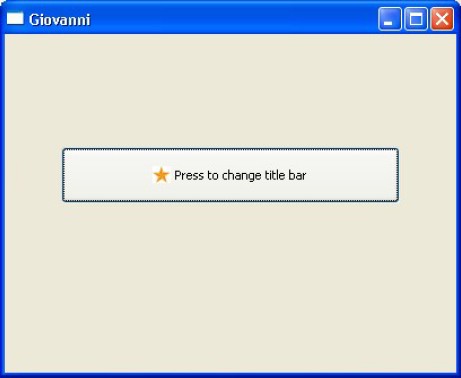
BUTTON - Button with icon
The following example shows how to create a simple button with a icon. If pressed, the title
bar changes.
#include "hmg.ch"
FUNCTION Main()
DEFINE WINDOW Form_1 ;
AT 90,90 ;
WIDTH 400 ;
HEIGHT 300 ;
TITLE "Giovanni" ;
MAIN
END WINDOW
@ 100, 50 BUTTON button ;
PARENT Form_1 ;
CAPTION "Press to change title bar" ;
PICTURE "star.bmp" LEFT ;
ONCLICK Pressed() ;
WIDTH 300 ;
HEIGHT 50
Form_1.Activate
RETURN NIL
FUNCTION Pressed()
Form_1.title := "Ok, changed"
RETURN NIL
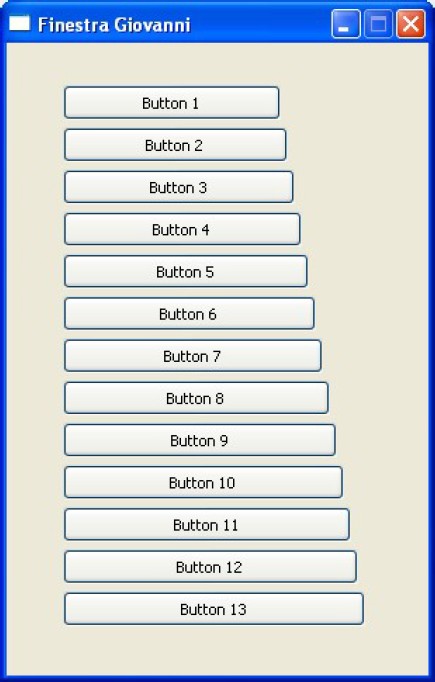
BUTTON - Many Buttons
The following example shows how to create many buttons. The buttons have no actions.

#include "hmg.ch"
FUNCTION Main()
LOCAL cButton,k
DEFINE WINDOW Form_1 ;
AT 90,90 ;
WIDTH 300 ;
HEIGHT 500 ;
TITLE "Finestra Giovanni" ;
MAIN
END WINDOW
for k := 1 TO 13
cButton := "button" + alltrim( str( k ) )
@ 30*k, 75 BUTTON &cbutton ;
PARENT Form_1 ;
CAPTION "Button " + AllTrim( Str( k ) ) ;
WIDTH 150 ;
HEIGHT 25
next k
Form_1.Activate
RETURN NIL
BUTTON - Many Buttons with variable dimensions
The following example shows how to create many buttons. Their dimension is set by an
incremental variable.
#include "hmg.ch"
FUNCTION Main()
LOCAL cButton,k
DEFINE WINDOW Form_1 ;
AT 90,90 ;
WIDTH 400 ;
HEIGHT 500 ;
TITLE "Finestra Giovanni" ;
MAIN
END WINDOW
for k := 1 TO 13
cButton := "button" + alltrim( str( k ) )
@ 30*k, 75 BUTTON &cbutton ;
PARENT Form_1 ;
CAPTION "Button " + AllTrim( Str( k ) ) ;
WIDTH 150 + ( k * 5 ) ;
HEIGHT 25
next k
Form_1.Activate
RETURN NIL
BUTTON - Button Tips
The following example shows how to create a button with the tip.

#include "hmg.ch"
FUNCTION Main()
DEFINE WINDOW Form_1 ;
AT 90,90 ;
WIDTH 300 ;
HEIGHT 200 ;
TITLE "Giovanni" ;
MAIN
END WINDOW
@ 50, 50 BUTTON button ;
PARENT Form_1 ;
CAPTION "Press" ;
TOOLTIP "This is an help that explains the function of the button"
Form_1.Activate
RETURN NIL
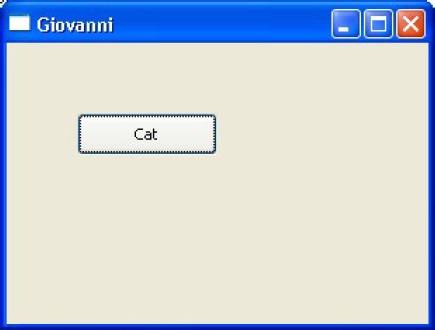
BUTTON - Button that plays a Wav file
The following example shows how to create a button to miaow a cat.
#include "hmg.ch"
FUNCTION Main()
DEFINE WINDOW Form_1 ;
AT 90,90 ;
WIDTH 300 ;
HEIGHT 200 ;
TITLE "Giovanni" ;
MAIN
END WINDOW
@ 50, 50 BUTTON button ;
PARENT Form_1 ;
CAPTION "Cat" ;
ONCLICK Pressed()
Form_1.Activate
RETURN NIL
FUNCTION Pressed()
PLAY WAVE "cat.wav"
RETURN NIL
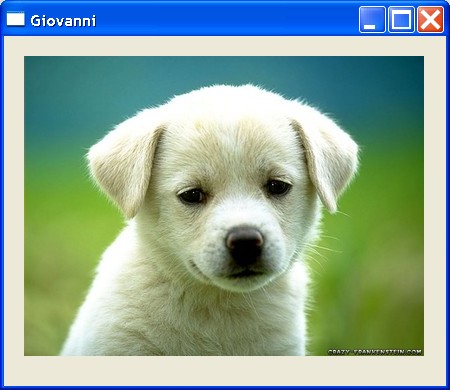
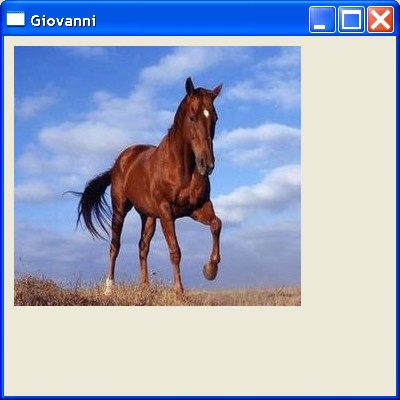
IMAGE - Adding an image
The following example shows how to add an image.
#include "hmg.ch"
FUNCTION Main()
DEFINE WINDOW Form_1 ;
AT 90,90 ;
WIDTH 450 ;
HEIGHT 390 ;
TITLE "Giovanni" ;
MAIN
END WINDOW
@ 20,20 IMAGE foto ;
PARENT Form_1 ;
PICTURE "dog.jpg" ;
WIDTH 400 ;
HEIGHT 300 ;
STRETCH
ACTIVATE WINDOW Form_1
RETURN NIL
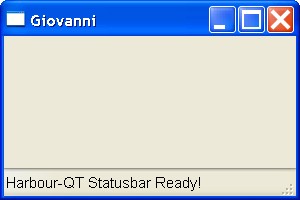
STATUSBAR - Status Bar
The following example shows how to create and modify the status bar, at the bottom
of the window.
#include "hmg.ch"
FUNCTION Main()
DEFINE WINDOW Form_1 ;
AT 90,90 ;
WIDTH 300 ;
HEIGHT 200 ;
TITLE "Giovanni" ;
MAIN
END WINDOW
DEFINE STATUSBAR PARENT Form_1
STATUSITEM "Harbour Statusbar Ready!"
END STATUSBAR
Form_1.Activate
RETURN NIL
STATUSBAR - Status Bar and time clock
The following example shows how to show a clock on the status bar, at the bottom of
the window.
#include "hmg.ch"
FUNCTION Main()
DEFINE WINDOW Form_1 ;
AT 90,90 ;
WIDTH 300 ;
HEIGHT 200 ;
TITLE "Giovanni" ;
MAIN
END WINDOW
DEFINE STATUSBAR PARENT Form_1
STATUSITEM "clock"
END STATUSBAR
DEFINE TIMER tempo PARENT Form_1 ;
INTERVAL 1000 ;
ACTION ShowTime()
Form_1.Activate
RETURN NIL
FUNCTION ShowTime()
Form_1.StatusBar.Item(1) := time()
RETURN NIL
STATUSBAR - Multiple Status Bar
The following example shows how to create a status bar composed by several widgets.

#include "hmg.ch"
FUNCTION Main()
DEFINE WINDOW Form_1 ;
AT 90,90 ;
WIDTH 600 ;
HEIGHT 200 ;
TITLE "Giovanni" ;
MAIN
END WINDOW
DEFINE STATUSBAR PARENT Form_1
STATUSITEM "StatusBar 1" WIDTH 200
STATUSITEM "Date: " + DTOC( DATE() ) WIDTH 200
STATUSITEM "Num Lock: Active" WIDTH 200
END STATUSBAR
Form_1.Activate
RETURN NIL
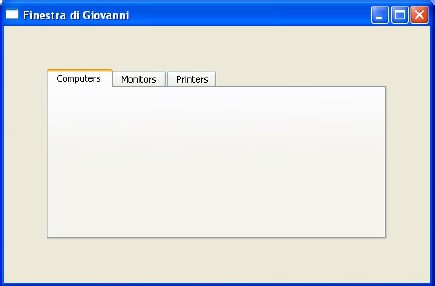
TAB - TAB Control
The following example shows how to create three Tab.
#include "hmg.ch"
FUNCTION Main()
DEFINE WINDOW Form_1 ;
AT 90,90 ;
WIDTH 500 ;
HEIGHT 350 ;
TITLE "Finestra di Giovanni" ;
MAIN
END WINDOW
DEFINE TAB tabella ;
PARENT Form_1 ;
AT 50, 50 ;
WIDTH 400 ;
HEIGHT 200
DEFINE PAGE "Computers"
END PAGE
DEFINE PAGE "Monitors"
END PAGE
DEFINE PAGE "Printers"
END PAGE
END TAB
Form_1.Activate
RETURN NIL
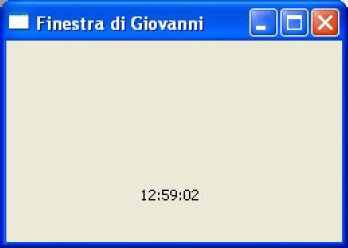
TIMER - Timer
The following example shows a clock every 1 second.
#include "hmg.ch"
FUNCTION Main()
DEFINE WINDOW Form_1 ;
AT 90,90 ;
WIDTH 250 ;
HEIGHT 150 ;
TITLE "Finestra di Giovanni" ;
MAIN
END WINDOW
@ 70, 100 LABEL Clock ;
PARENT Form_1 ;
VALUE "clocking..."
DEFINE TIMER tempo ;
PARENT Form_1 ;
INTERVAL 1000 ;
ACTION print_clock()
Form_1.Activate
RETURN NIL
FUNCTION print_clock()
Form_1.Clock.value := time()
RETURN NIL
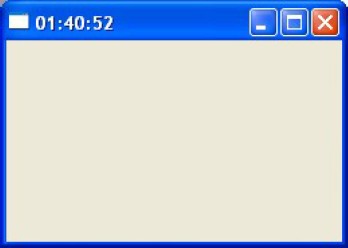
TIMER - Timer in the Window Title
The following example shows a clock on the Title bar of a window.
#include "hmg.ch"
FUNCTION Main()
DEFINE WINDOW Form_1 ;
AT 90,90 ;
WIDTH 250 ;
HEIGHT 150 ;
MAIN
END WINDOW
DEFINE TIMER tempo ;
PARENT Form_1 ;
INTERVAL 1000 ;
ACTION print_clock()
Form_1.Activate
RETURN NIL
FUNCTION print_clock()
Form_1.title := time()
RETURN NIL
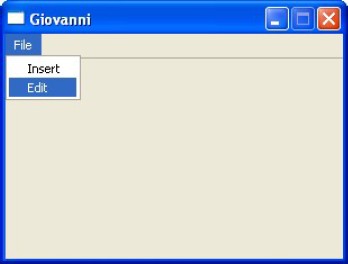
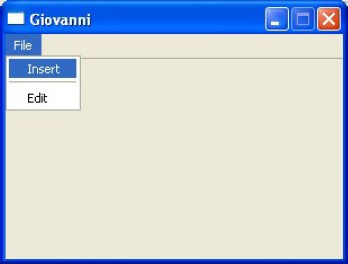
MENU - Menu
The following example shows the usage of menu. Every item can be connected to any function or UDF.
#include "hmg.ch"
FUNCTION Main()
DEFINE WINDOW Form_1 ;
AT 90,90 ;
WIDTH 300 ;
HEIGHT 200 ;
TITLE "Giovanni" ;
MAIN
END WINDOW
DEFINE MAIN MENU OF Form_1
DEFINE POPUP "File"
MENUITEM "Insert" ACTION none()
MENUITEM "Edit" ACTION none()
END POPUP
END MENU
Form_1.Activate
RETURN NIL
FUNCTION none()
RETURN NIL
MENU - Menu with separators
The following example shows the usage of menu. An item can separated from the other
by a line separator. Every item can be connected to any function or UDF.
#include "hmg.ch"
FUNCTION Main()
DEFINE WINDOW Form_1 ;
AT 90,90 ;
WIDTH 300 ;
HEIGHT 200 ;
TITLE "Giovanni" ;
MAIN
END WINDOW
DEFINE MAIN MENU OF Form_1
DEFINE POPUP "File"
MENUITEM "Insert" ACTION none()
SEPARATOR
MENUITEM "Edit" ACTION none()
END POPUP
END MENU
Form_1.Activate
RETURN NIL
FUNCTION none()
RETURN NIL
QMenu - Menu and sub-menu
The following example shows the usage of menu and sub-menu. The sub-menu is also a menu.

#include "hmg.ch"
FUNCTION Main()
DEFINE WINDOW Form_1 ;
AT 90,90 ;
WIDTH 300 ;
HEIGHT 200 ;
TITLE "Giovanni" ;
MAIN
END WINDOW
DEFINE MAIN MENU OF Form_1
DEFINE POPUP "File"
DEFINE POPUP "Insert"
MENUITEM "Insert Image" ACTION none()
MENUITEM "Insert Table" ACTION none()
MENUITEM "Insert Table" ACTION none()
END POPUP
MENUITEM "Edit" ACTION none()
END POPUP
END MENU
Form_1.Activate
RETURN NIL
FUNCTION none()
RETURN NIL
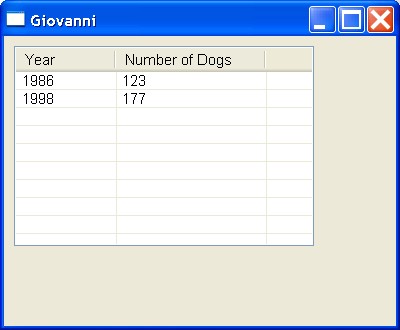
GRID - Simple table
The following example shows how to create a small table, with 2 rows and 2 columns.
#include "hmg.ch"
FUNCTION Main()
LOCAL aRows [2,2]
aRows [1] := { "1986" , "123" }
aRows [2] := { "1998" , "177" }
DEFINE WINDOW Form_1 ;
AT 90,90 ;
WIDTH 400 ;
HEIGHT 330 ;
TITLE "Giovanni" ;
MAIN
END WINDOW
@ 10,10 GRID Grid_1 ;
PARENT Form_1 ;
WIDTH 300 ;
HEIGHT 200 ;
HEADERS {"Year","Number of Dogs"} ;
WIDTHS {100,150} ;
ITEMS aRows
ACTIVATE WINDOW Form_1
RETURN NIL
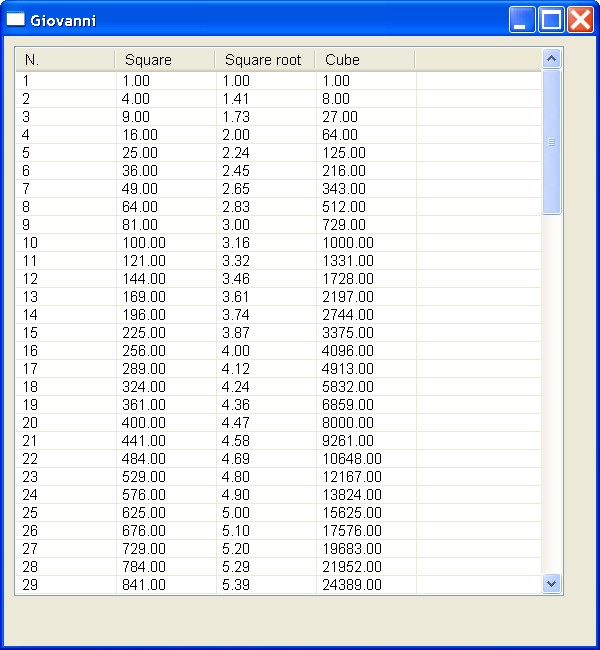
GRID - Arithmetic tables
The following example shows how to create an Arithmetic table, with 100 rows and 4 columns.
The first column contains the number, the second column contains the square of the number,
the third column contains the square root of the number and the fourth column contains the cube
of the number. The numbers are generated by a loop.
#include "hmg.ch"
FUNCTION Main()
LOCAL k,aRows [100,4]
for k :=1 to 100
aRows[k] := { ALLTRIM(STR(k)),ALLTRIM(STR(k^2)),ALLTRIM(STR(SQRT(k))),ALLTRIM(STR(k^3)) }
next k
DEFINE WINDOW Form_1 ;
AT 90,90 ;
WIDTH 600 ;
HEIGHT 650 ;
TITLE "Giovanni" ;
MAIN
END WINDOW
@ 10,10 GRID Grid_1 ;
PARENT Form_1 ;
WIDTH 550 ;
HEIGHT 550 ;
HEADERS { "N." , "Square" , "Square root" , "Cube" } ;
WIDTHS { 100 , 100 , 100 , 100 } ;
ITEMS aRows
ACTIVATE WINDOW Form_1
RETURN NIL
GRID - Browsing a DBF
The following example shows how to browse a DBF database.
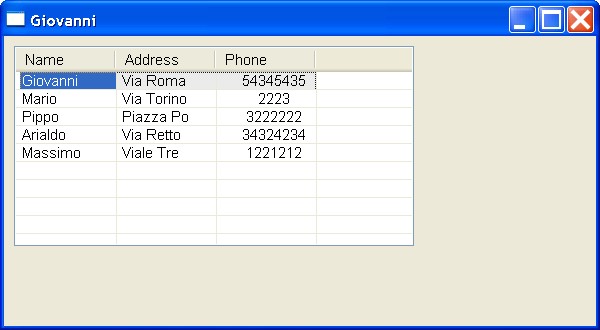
#include "hmg.ch"
FUNCTION Main()
DEFINE WINDOW Form_1 ;
AT 90,90 ;
WIDTH 600 ;
HEIGHT 330 ;
TITLE "Giovanni" ;
MAIN
END WINDOW
USE prova
@ 10,10 GRID Grid_1 ;
PARENT Form_1 ;
WIDTH 400 ;
HEIGHT 200 ;
VALUE { 1 , 1 } ;
HEADERS {"Name","Address","Phone"} ;
WIDTHS {100,100,100} ;
ROWSOURCE "prova" ;
COLUMNFIELDS {"Name","Address","Phone"} ;
ACTIVATE WINDOW Form_1
USE
RETURN NIL
INPUTBOX - Input Dialog window
The following example uses a input dialog window to insert values into the program.
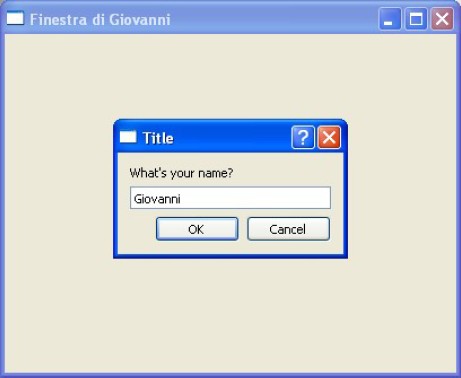
#include "hmg.ch"
FUNCTION Main()
DEFINE WINDOW Form_1 ;
AT 90,90 ;
WIDTH 400 ;
HEIGHT 300 ;
TITLE "Finestra di Giovanni" ;
ON INIT Change() ;
MAIN
END WINDOW
ACTIVATE WINDOW Form_1
RETURN NIL
FUNCTION Change()
Form_1.title := InputBox( "What's your name?" , "Title" )
RETURN NIL
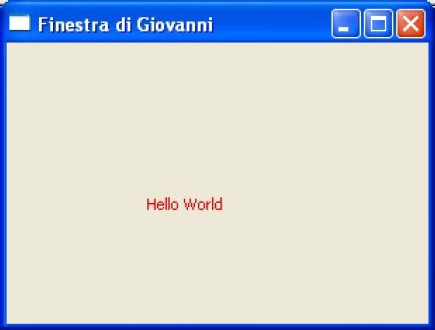
GETCOLOR - Color Dialog
The following example shows how to use a color dialog to change the color of a text label.
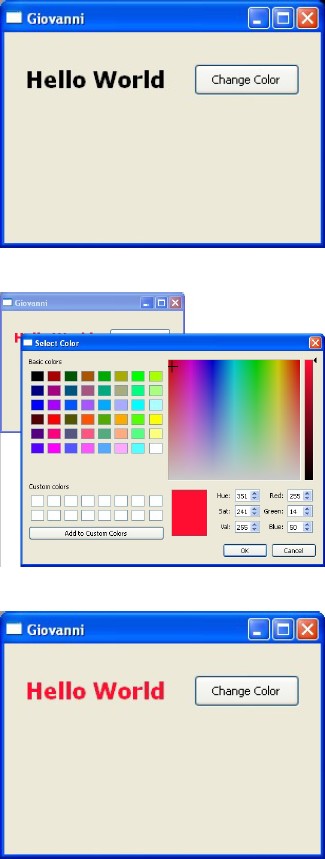
#include "hmg.ch"
FUNCTION Main()
DEFINE WINDOW Form_1 ;
AT 90,90 ;
WIDTH 300 ;
HEIGHT 200 ;
TITLE "Giovanni" ;
MAIN
END WINDOW
@ 20,20 LABEL testo ;
PARENT Form_1 ;
VALUE "Hello World" ;
FONT "Arial" SIZE 24 ;
BOLD
@ 20,180 BUTTON bottone ;
PARENT Form_1 ;
CAPTION "Change Color" ;
ONCLICK color()
ACTIVATE WINDOW Form_1
RETURN NIL
FUNCTION color()
Form_1.testo.FONTCOLOR := GetColor()
RETURN NIL
PROGRESSBAR - Progress Bar
The following example shows use of a progress bar. It' useful during a long counting or
elaboration of big archives.
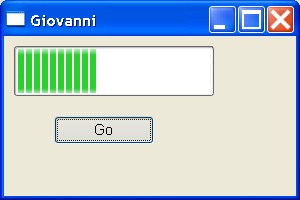
#include "hmg.ch"
FUNCTION Main()
DEFINE WINDOW Form_1 ;
AT 90,90 ;
WIDTH 300 ;
HEIGHT 200 ;
TITLE "Giovanni" ;
MAIN
END WINDOW
@ 10,10 PROGRESSBAR progresso ;
PARENT Form_1 ;
RANGE 1,10000 ;
WIDTH 200 ;
HEIGHT 50 ;
@ 80,50 BUTTON bottone ;
PARENT Form_1 ;
CAPTION "Go" ;
ONCLICK go()
ACTIVATE WINDOW Form_1
RETURN NIL
FUNCTION go()
LOCAL k
FOR k:=1 TO 10000 STEP 0.1
Form_1.progresso.value := k
NEXT K
RETURN NIL
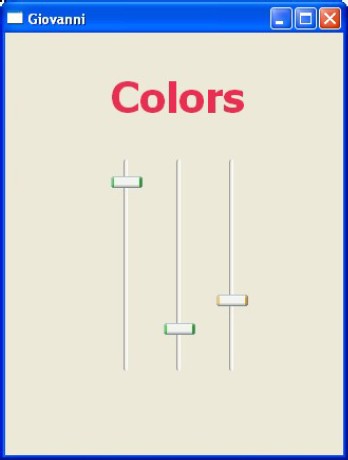
SLIDER - Sliders RGB
The following example uses three sliders to change the RGB color of a text.
#include "hmg.ch"
FUNCTION Main()
DEFINE WINDOW Form_1 ;
AT 90,90 ;
WIDTH 320 ;
HEIGHT 400 ;
TITLE "Giovanni" ;
MAIN
END WINDOW
@ 10,110 LABEL testo ;
PARENT Form_1 ;
VALUE "Colors" ;
FONT "Arial" SIZE 20 ;
HEIGHT 50 ;
BOLD
@ 090,100 SLIDER SliderRed ;
PARENT Form_1 ;
RANGE 0, 255 ;
WIDTH 30 ;
HEIGHT 200 ;
VALUE 0 ;
ON CHANGE color() ;
VERTICAL
@ 090,150 SLIDER SliderGreen ;
PARENT Form_1 ;
RANGE 0, 255 ;
WIDTH 30 ;
HEIGHT 200 ;
VALUE 0 ;
ON CHANGE color() ;
VERTICAL
@ 090,200 SLIDER SliderBlue ;
PARENT Form_1 ;
RANGE 0, 255 ;
WIDTH 30 ;
HEIGHT 200 ;
VALUE 0 ;
ON CHANGE color() ;
VERTICAL
ACTIVATE WINDOW Form_1
RETURN NIL
FUNCTION color()
Form_1.testo.FONTCOLOR := {Form_1.SliderRed.value,Form_1.SliderGreen.value,Form_1.SliderBlue.value}
RETURN NIL
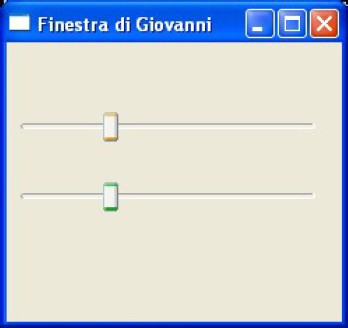
SLIDER - Sliders synchronization
The following example shows how to synchronize two sliders, so that moving a slider,
it moves the other.
#include "hmg.ch"
FUNCTION Main()
DEFINE WINDOW Form_1 ;
AT 90,90 ;
WIDTH 350 ;
HEIGHT 200 ;
TITLE "Finestra di Giovanni" ;
MAIN
END WINDOW
@ 050,10 SLIDER Slider1 ;
PARENT Form_1 ;
RANGE 1, 100 ;
WIDTH 300 ;
HEIGHT 30 ;
ON CHANGE go1()
@ 100,10 SLIDER Slider2 ;
PARENT Form_1 ;
RANGE 1, 100 ;
WIDTH 300 ;
HEIGHT 30 ;
ON CHANGE go2()
ACTIVATE WINDOW Form_1
RETURN NIL
FUNCTION go1()
Form_1.Slider2.value := Form_1.Slider1.value
RETURN NIL
FUNCTION go2()
Form_1.Slider1.value := Form_1.Slider2.value
RETURN NIL
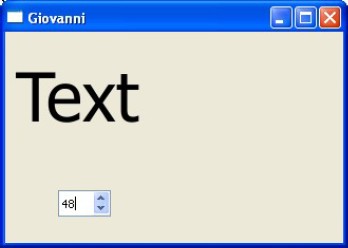
SPINNER - Spin Control
The following example uses a spinner control, to modify the size of a text. Values can be
typed or chosen with the arrows.
#include "hmg.ch"
FUNCTION Main()
DEFINE WINDOW Form_1 ;
AT 90,90 ;
WIDTH 320 ;
HEIGHT 200 ;
TITLE "Giovanni" ;
MAIN
END WINDOW
@ 10,10 LABEL testo ;
PARENT Form_1 ;
VALUE "Text" ;
FONT "Arial" SIZE 28 ;
HEIGHT 50 ;
@ 100,50 SPINNER choose ;
PARENT Form_1 ;
RANGE 1, 72 ;
WIDTH 60 ;
VALUE 28 ;
ON CHANGE go()
ACTIVATE WINDOW Form_1
RETURN NIL
FUNCTION go()
Form_1.testo.FontSize := Form_1.choose.value
RETURN NIL
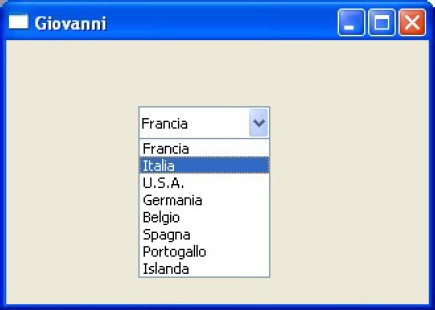
COMBOBOX - ComboBox
The following example creates a combobox, with many items. User can select any item.
#include "hmg.ch"
FUNCTION Main()
DEFINE WINDOW Form_1 ;
AT 90,90 ;
WIDTH 320 ;
HEIGHT 200 ;
TITLE "Giovanni" ;
MAIN
END WINDOW
@ 50,100 COMBOBOX nazioni ;
PARENT Form_1 ;
ITEMS { "Italia","U.S.A.","Germania","Belgio","Spagna","Portogallo","Islanda" } ;
VALUE 1
ACTIVATE WINDOW Form_1
RETURN NIL
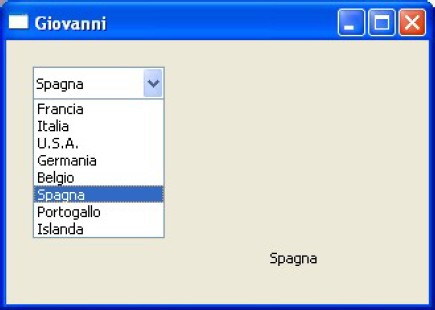
COMBOBOX - ComboBox with Update
The following example creates a combobox, with many items. User can select any item.
When selected, it's shown in a label.
#include "hmg.ch"
FUNCTION Main()
DEFINE WINDOW Form_1 ;
AT 90,90 ;
WIDTH 320 ;
HEIGHT 200 ;
TITLE "Giovanni" ;
MAIN
END WINDOW
@ 50,100 COMBOBOX nazioni ;
PARENT Form_1 ;
ITEMS { "Italia","U.S.A.","Germania","Belgio","Spagna","Portogallo","Islanda" } ;
ON CHANGE update()
@ 100,200 LABEL testo ;
PARENT Form_1
ACTIVATE WINDOW Form_1
RETURN NIL
FUNCTION update()
Form_1.testo.value := Form_1.nazioni.item(Form_1.nazioni.value)
RETURN NIL
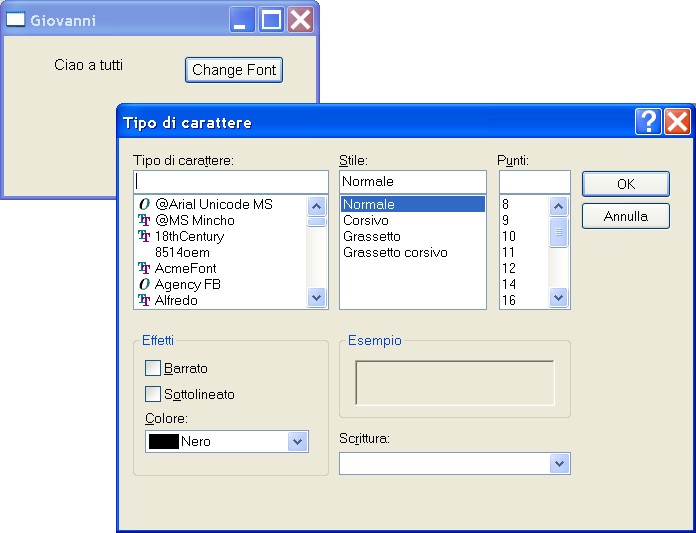
GETFONT - Change the Fonts
The following example allow to change the text with the selected font.
#include "hmg.ch"
FUNCTION Main()
DEFINE WINDOW Form_1 ;
AT 90,90 ;
WIDTH 320 ;
HEIGHT 200 ;
TITLE "Giovanni" ;
MAIN
END WINDOW
@ 20,50 LABEL testo ;
PARENT Form_1 ;
VALUE "Ciao a tutti" ;
@ 20,180 BUTTON bottone ;
PARENT Form_1 ;
CAPTION "Change Font" ;
ONCLICK font()
ACTIVATE WINDOW Form_1
RETURN NIL
FUNCTION font()
LOCAL aFont
aFont := GetFont()
Form_1.testo.fontname := aFont[1]
Form_1.testo.fontsize := aFont[2]
Form_1.testo.fontbold := aFont[3]
Form_1.testo.fontitalic := aFont[4]
RETURN NIL
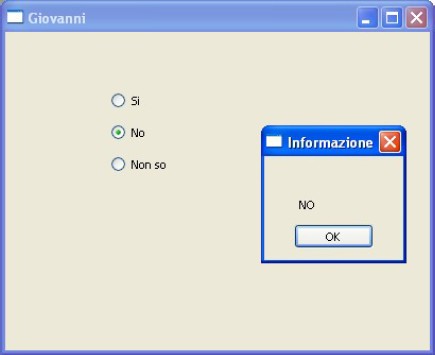
RADIOGROUP - Radio Group
The following example shows how to use a radio button, with three options. Every option is
connected to a function.
#include "hmg.ch"
FUNCTION Main()
DEFINE WINDOW Form_1 ;
AT 90,90 ;
WIDTH 400 ;
HEIGHT 300 ;
TITLE "Giovanni" ;
MAIN
END WINDOW
@ 50,100 RADIOGROUP opzioni ;
PARENT Form_1 ;
OPTIONS {"Si","No","Non so"} ;
VALUE 1 ;
ON CHANGE message()
ACTIVATE WINDOW Form_1
RETURN NIL
FUNCTION message()
msgbox(Form_1.opzioni.caption(Form_1.opzioni.value))
RETURN NIL
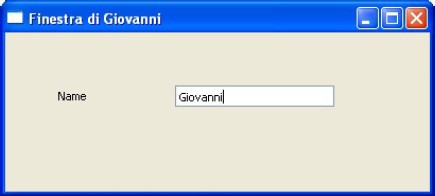
TEXTBOX - Text box
The following example uses a textbox, to insert and view any data.
#include "hmg.ch"
FUNCTION Main()
DEFINE WINDOW Form_1 ;
AT 90,90 ;
WIDTH 400 ;
HEIGHT 150 ;
TITLE "Finestra di Giovanni" ;
MAIN
END WINDOW
@ 50,50 LABEL testo ;
PARENT Form_1 ;
VALUE "Name" ;
@ 50,160 TEXTBOX name ;
PARENT Form_1
ACTIVATE WINDOW Form_1
RETURN NIL
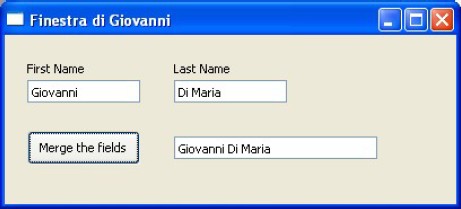
TEXTBOX - Merging two Line Edits
The following example uses two line edits, to insert and view data. By pressing the button,
the values of the two Line Edits are merged and added to a third Line Edit.
#include "hmg.ch"
FUNCTION Main()
DEFINE WINDOW Form_1 ;
AT 90,90 ;
WIDTH 400 ;
HEIGHT 250 ;
TITLE "Finestra di Giovanni" ;
MAIN
END WINDOW
@ 20,20 LABEL testo1 ;
PARENT Form_1 ;
VALUE "First Name"
@ 40,20 TEXTBOX name ;
PARENT Form_1
@ 20,150 LABEL testo2 ;
PARENT Form_1 ;
VALUE "Last Name"
@ 40,150 TEXTBOX surname ;
PARENT Form_1
@ 90,150 TEXTBOX sum ;
PARENT Form_1 ;
WIDTH 200
@ 85,20 BUTTON bottone ;
PARENT Form_1 ;
CAPTION "Merge the fields" ;
WIDTH 120 ;
ONCLICK merge()
ACTIVATE WINDOW Form_1
RETURN NIL
FUNCTION merge()
Form_1.sum.value := Form_1.name.value + Form_1.surname.value
RETURN NIL
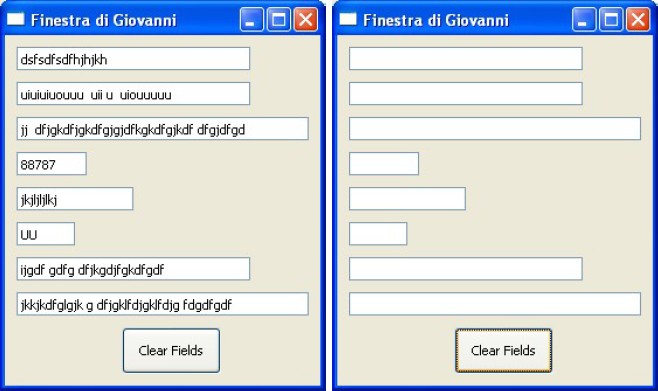
TEXTBOX - Resetting Line Edits
The following example shows how to reset and clear line edits.
#include "hmg.ch"
FUNCTION Main()
DEFINE WINDOW Form_1 ;
AT 90,90 ;
WIDTH 270 ;
HEIGHT 360 ;
TITLE "Finestra di Giovanni" ;
MAIN
END WINDOW
@ 010,10 TEXTBOX F1 PARENT Form_1 WIDTH 200 HEIGHT 20
@ 040,10 TEXTBOX F2 PARENT Form_1 WIDTH 200 HEIGHT 20
@ 070,10 TEXTBOX F3 PARENT Form_1 WIDTH 250 HEIGHT 20
@ 100,10 TEXTBOX F4 PARENT Form_1 WIDTH 60 HEIGHT 20
@ 130,10 TEXTBOX F5 PARENT Form_1 WIDTH 100 HEIGHT 20
@ 160,10 TEXTBOX F6 PARENT Form_1 WIDTH 50 HEIGHT 20
@ 190,10 TEXTBOX F7 PARENT Form_1 WIDTH 200 HEIGHT 20
@ 220,10 TEXTBOX F8 PARENT Form_1 WIDTH 250 HEIGHT 20
@ 250,75 BUTTON bottone ;
PARENT Form_1 ;
CAPTION "Clear Fields" ;
WIDTH 120 ;
ONCLICK cancella()
ACTIVATE WINDOW Form_1
RETURN NIL
FUNCTION cancella()
Form_1.F1.value := ""
Form_1.F2.value := ""
Form_1.F3.value := ""
Form_1.F4.value := ""
Form_1.F5.value := ""
Form_1.F6.value := ""
Form_1.F7.value := ""
Form_1.F8.value := ""
RETURN NIL
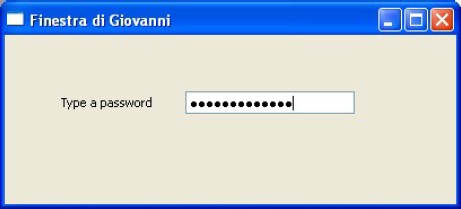
TEXTBOX - Password
The following example shows how to insert a password into a line edit. The asterisks will be shown
instead of the characters actually entered.
#include "hmg.ch"
FUNCTION Main()
DEFINE WINDOW Form_1 ;
AT 90,90 ;
WIDTH 400 ;
HEIGHT 150 ;
TITLE "Finestra di Giovanni" ;
MAIN
END WINDOW
@ 50,50 LABEL Lb ;
PARENT Form_1 ;
VALUE "Type a password"
@ 50,180 TEXTBOX pw ;
PARENT Form_1 ;
WIDTH 150 ;
HEIGHT 20 ;
PASSWORD
ACTIVATE WINDOW Form_1
RETURN NIL
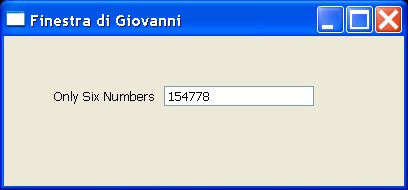
TEXTBOX - Set Input Mask
The following example shows how to set a mask in a textbox, to filter the characters inserted.
The input mask is similar to PICTURE in @ SAY ... GET command.
P#include "hmg.ch"
FUNCTION Main()
DEFINE WINDOW Form_1 ;
AT 90,90 ;
WIDTH 400 ;
HEIGHT 150 ;
TITLE "Finestra di Giovanni" ;
MAIN
END WINDOW
@ 50,50 LABEL Lb ;
PARENT Form_1 ;
VALUE "Only Six Numbers"
@ 50,180 TEXTBOX number ;
PARENT Form_1 ;
WIDTH 150 ;
HEIGHT 20 ;
INPUTMASK "999999"
ACTIVATE WINDOW Form_1
RETURN NIL
InputMask String (Numeric Textbox):
9 Displays digits
$ Displays a dollar sign in place of a leading space
* Displays an asterisk in place of a leading space
. Specifies a decimal point position
, Specifies a comma position
InputMask String (Non-Numeric Textbox):
9 Digits
A Alphabetic Characters
! Converts an alphabetic character to uppercase
(All other characters ar included in text in the position indicated by the mask)
Format String (Allowed in Numeric Textbox Only):
C : Displays CR after positive numbers
X : Displays DB after negative numbers
( : Encloses negative numbers in parentheses
E : Displays numbers in British format
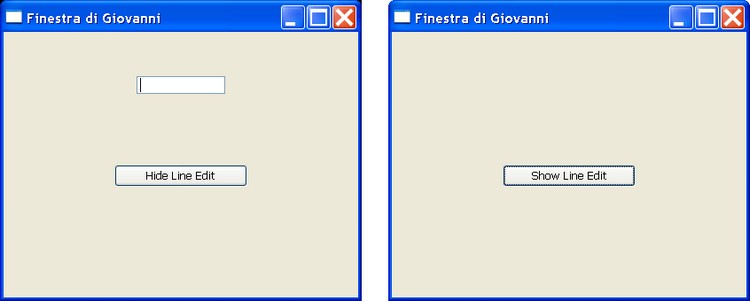
TEXTBOX - How to Hide and Show a line edit
The following example shows how to to hide and show a line edit, using a button.
Also the label of the button changes, if it's pressed.
#include "hmg.ch"
FUNCTION Main()
DEFINE WINDOW Form_1 ;
AT 90,90 ;
WIDTH 400 ;
HEIGHT 300 ;
TITLE "Finestra di Giovanni" ;
MAIN
END WINDOW
@ 50,150 TEXTBOX number ;
PARENT Form_1
@ 150,125 BUTTON bottone ;
PARENT Form_1 ;
CAPTION "Hide Textbox" ;
WIDTH 200 ;
ONCLICK go()
ACTIVATE WINDOW Form_1
RETURN NIL
FUNCTION go()
Form_1.number.visible := .NOT. Form_1.number.visible
IF .NOT. Form_1.number.visible
Form_1.bottone.CAPTION := "Show Line Edit"
ELSE
Form_1.bottone.CAPTION := "Hide Line Edit"
END IF
RETURN NIL
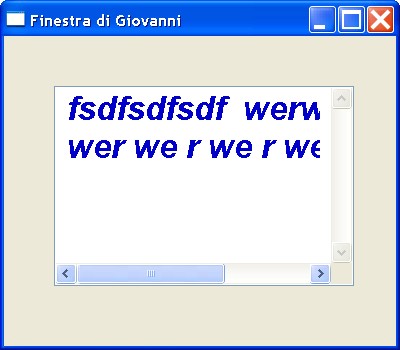
EDITBOX - Edit box
The following example shows an editor and sets his text to bold, italic and size 20, color blue.
#include "hmg.ch"
FUNCTION Main()
DEFINE WINDOW Form_1 ;
AT 90,90 ;
WIDTH 400 ;
HEIGHT 350 ;
TITLE "Finestra di Giovanni" ;
MAIN
END WINDOW
@ 50,50 EDITBOX editor ;
PARENT Form_1 ;
WIDTH 300 ;
HEIGHT 200 ;
FONTCOLOR {0,0,200} ;
FONT "arial" SIZE 20 ;
BOLD ITALIC
ACTIVATE WINDOW Form_1
RETURN NIL
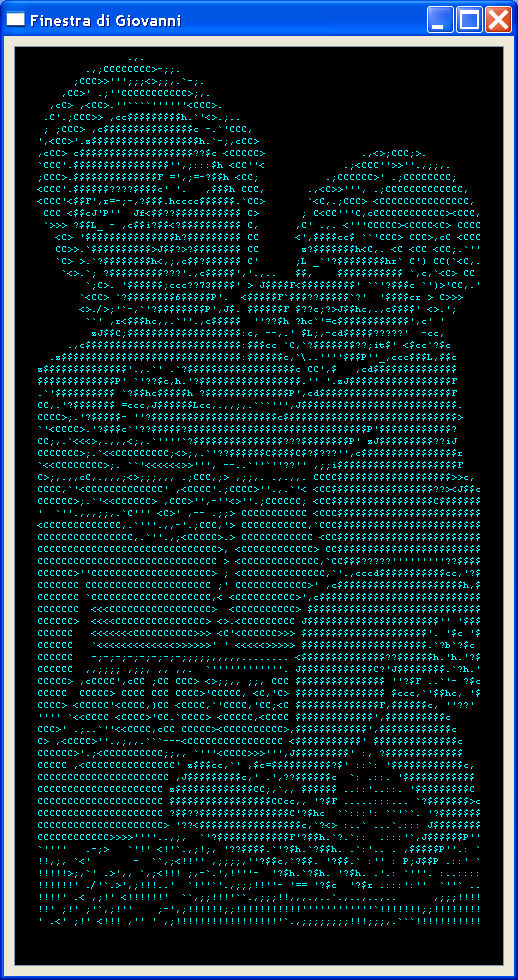
EDITBOX - Ascii Art
The following example shows how to draw with Ascii Art in a editbox. The font used must be
"Courier". The drawing is stored in a string.
#include "hmg.ch"
#define CR Chr( 13 ) + Chr( 10 )
FUNCTION Main()
LOCAL cSt
cSt := ""
cSt := cSt + " .,. " + CR
cSt := cSt + " .,;CCCCCCCC>-;;. " + CR
cSt := cSt + " ;CCC>>''';;;<>;;,.`-;. " + CR
cSt := cSt + " ,CC>' .;''CCCCCCCCCCC>;,. " + CR
cSt := cSt + " ,cC> ,<CC>.''````''''''<CCC>. " + CR
cSt := cSt + " .C'.;CCC>> ,cc$$$$$$$$$h.`'<>.;.. " + CR
cSt := cSt + " ; ;CCC> ,c$$$$$$$$$$$$$$$c -.`'CCC, " + CR
cSt := cSt + " ',<CC>'.z$$$$$$$$$$$$$$$$$$h.`-;,cCC> " + CR
cSt := cSt + " ,cCC> c$$$$$$$$$$$$$$$$$$$??$c <CCCCC> .,<>;CCC;>. " + CR
cSt := cSt + " `CCC'.$$$$$$$$$$$$$$$$'',;:::$h <CC''< .;<CCC''>>''.,;;,. " + CR
cSt := cSt + " ;CCC>.$$$$$$$$$$$$$$F =',;=-?$$h <CC; .;CCCCCC>' .;CCCCCCCC; " + CR
cSt := cSt + " <CCC'.$$$$$$????$$$$c' '. ,$$$h CCC, .,<C>>''', .;CCCCCCCCCCCCC, " + CR
cSt := cSt + " <CCC'<$$F',r=-;-,?$$$.hcccc$$$$$$.`CC> `<C,.;CCC> <CCCCCCCCCCCCCCC, " + CR
cSt := cSt + " CCC <$$cJ'P'' Jf<$$??$$$$$$$$$$$ C> ; C<CC'''C,cCCCCCCCCCCCC><CCC, " + CR
cSt := cSt + " `>>> ?$$L_ - ,c$$i?$$<?$$$$$$$$$$ C, ,C' .,. <'''CCCCC><CCCC<C> CCCC " + CR
cSt := cSt + " <C> '$$$$$$$$$$$$$$$h?$$$$$$$$$ CC <',$$$$cc$ ``'CCC> CCC>,cC <CCC " + CR
cSt := cSt + " CC>>.`$$$$$$$$$$>J$$?>?$$$$$$$$ CC z?$$$$$$$h<C,. <C <CC <CC;.`'' " + CR
cSt := cSt + " `C> >.`?$$$$$$$$h<,;,c$$?$$$$$$ C' ;L _`'?$$$$$$$$hr` C') CC(`<C,. " + CR
cSt := cSt + " `<>.`; ?$$$$$$$$$???'.,c$$$$$','.,.. $$, $$$$$$$$$$$ `,c,`<C> CC " + CR
cSt := cSt + " `;C>. '$$$$$$;ccc??73$$$$' > J$$$$F<$$$$$$$$$' ``'?$$$c `')>'CC,.' " + CR
cSt := cSt + " `<CC> `?$$$$$$$$6$$$$$P'. <$$$$$F`$$$??$$$$$`?' '$$$$cr > C>>> " + CR
cSt := cSt + " <>./>;'`-,`'?$$$$$$$$P',J$. $$$$$$F $??c;?>J$$hc,.,c$$$$' <>.'; " + CR
cSt := cSt + " ``' ,r<$$$hc,,.`''.,c$$$$$ ''??$h ?hc`'=c$$$$$$$$$$$$',c' ' " + CR
cSt := cSt + " zJ$$C;$$$$$$$$$$$$$$$$$$$:c, --,.' $L;,-cd$$$$$?????' -cc, " + CR
cSt := cSt + " .,c$$$$$$$$$$$$$$$$$$$$$$$$$$:$$$cc `C,`?$$$$$$$??;it$' <$cc`?$c " + CR
cSt := cSt + " .z$$$$$$$$$$$$$$$$$$$$$$$$$$$$$$:$$$$$$c,`\..''''$$$P''_,ccc$$$L,$$c " + CR
cSt := cSt + " z$$$$$$$$$$$$$$'.,.`' .`?$$$$$$$$$$$$$$$$$$c CC',$ ,cd$$$$$$$$$$$$$$ " + CR
cSt := cSt + " $$$$$$$$$$$$$P' `'??$c,h.'?$$$$$$$$$$$$$$$$$.'' '.zJ$$$$$$$$$$$$$$$$$F " + CR
cSt := cSt + " .`'$$$$$$$$$$ `?$$hc$$$$$h ?$$$$$$$$$$$$$$P',cd$$$$$$$$$$$$$$$$$$$$$$F " + CR
cSt := cSt + " CC,.'?$$$$$$$ =ccc,J$$$$$$Lcc,.,,;,.```''',J$$$$$$$$$$$$$$$$$$$$$$$$$$. " + CR
cSt := cSt + " CCCC>;.'?$$$$$- ''?$$$$$$$$$$$$$$$$$$$$$c$$$$$$$$$$$$$$$$$$$$$$$$$$$$$> " + CR
cSt := cSt + " `'<CCCC>.'?$$$c`'??$$$$$?$$$$$$$$$$$$$$$$$$$$$$$$$$$$$$P'$$$$$$$$$$$$? " + CR
cSt := cSt + " CC;,.`<<<>,.,,,<;,.`''''`?$$$$$$$$$$$$$$$???$$$$$$$$P' zJ$$$$$$$$$??iJ " + CR
cSt := cSt + " CCCCCCC>;.`<<CCCCCCCCC;<>;,.`'??$$$$$$C$$$$C$?$???'',c$$$$$$$$$$$$$$$$r " + CR
cSt := cSt + " `<<CCCCCCCC>;. ``'<<<<<<>>''', --..`''`''??'' ,;;i$$$$$$$$$$$$$$$$$$$$F " + CR
cSt := cSt + " C>;,.,,cC,.,,,;<>;;;,,, .;CCC,;> ,;;,. .,.,,. CCCC$$$$$$$$$$$$$$$$$$$>>c, " + CR
cSt := cSt + " CCCC,`'<CCCCCCCCCCCCC' ,<CCCC'.;CCCC>''.,.`'< <CC$$$$$$$$$$$$$$$$$??><J$$c " + CR
cSt := cSt + " CCCCCC>;.`'<<CCCCCC> ,CCC>'',-''<>''.;CCCCCC; <CC$$$$$$$$$$$$$$$$$C$$$$$$$ " + CR
cSt := cSt + " ' `''.,,,;;,.`C''' <C>' ,-- .;;> CCCCCCCCCCC <CCC$$$$$$$$$$$$$$$$$$$$$$$$ " + CR
cSt := cSt + " <CCCCCCCCCCCCC,.`'''.,,-'.;CCC,'> CCCCCCCCCCC,`CCC$$$$$$$$$$$$$$$$$$$$$$$$ " + CR
cSt := cSt + " CCCCCCCCCCCCCCCC,.`''.,;<CCCCC>.> CCCCCCCCCCCC <CC$$$$$$$$$$$$$$$$$$$$$$$$ " + CR
cSt := cSt + " CCCCCCCCCCCCCCCCCCCCCCCCCCCCCC>, <CCCCCCCCCCCC> CC$$$$$$$$$$$$$$$$$$$$$$$$ " + CR
cSt := cSt + " CCCCCCCCCCCCCCCCCCCCCCCCCCCCCC > <CCCCCCCCCCCCC,`CC$$$?????'''''''''??$$$$ " + CR
cSt := cSt + " CCCCCC>''CCCCCCCCCCCCCCCCCCCC> ; <CCCCCCCCCCCCCC,`'.,cccd$$$$$$$$$$$cc,'?$ " + CR
cSt := cSt + " CCCCCCC CCCCCCCCCCCCCCCCCCCCC ;' CCCCCCCCCCCC>' ,c$$$$$$$$$$$$$$$$$$$$$h,$ " + CR
cSt := cSt + " CCCCCCC `CCCCCCCCCCCCCCCCCCCC,< <CCCCCCCCCC>',c$$$$$$$$$$$$$$$$$$$$$$$$$$$ " + CR
cSt := cSt + " CCCCCCC <<<CCCCCCCCCCCCCCCCC> <CCCCCCCCCC> $$$$$$$$$$$$$$$$$$$$$$$$$$$$$ " + CR
cSt := cSt + " CCCCCC> <<<<CCCCCCCCCCCCCCC> <>.<CCCCCCCCC J$$$$$$$$$$$$$$$$$$$$$$'' '$$$ " + CR
cSt := cSt + " CCCCCC <<<<<<<CCCCCCCCCC>>> <C'<CCCCCC>>> $$$$$$$$$$$$$$$$$$$$$'. '$c '$ " + CR
cSt := cSt + " CCCCCC `<<<<<<<<<<<<<>>>>>>' ' <<<<<>>>>> $$$$$$$$$$$$$$$$$$$$$.`?b`?$c " + CR
cSt := cSt + " CCCCCC -;-;-;-;-;-;-;-;;;;;,,,,,........ <$$$$$$$$$$$$$$??$$$$$$h.'h.'?$ " + CR
cSt := cSt + " CCCCCC ,,;;;; ,;;, ,, ,,. `''''''''''''. J$$$$$$$$$$$$C?'J$$$$$$$$.`?h.' " + CR
cSt := cSt + " CCCCC> ,cCCCC',cCC ;CC CCC> <>;;,, ;;, CCC $$$$$$$$$$$$$$$ ''?$F ..`'- ?$c " + CR
cSt := cSt + " CCCCC CCCCC> CCCC CCC CCCC>'CCCCC, <C,'C> $$$$$$$$$$$$$$$ $ccc,`'$$hc, '$ " + CR
cSt := cSt + " CCCC> <CCCCC'<CCCC,)CC <CCCC,`'CCCC,'CC;<C $$$$$$$$$$$$$$F,$$$$$$c, ''??' " + CR
cSt := cSt + " '''' `<<CCCC <CCCC>'CC.`CCCC> <CCCCC,<CCCC $$$$$$$$$$$$$',$$$$$$$$$$c " + CR
cSt := cSt + " CCC>' .;..`''<<CCCC,cCC CCCCC><CCCCCCCCCC>,$$$$$$$$$$$$',$$$$$$$$$$$$c " + CR
cSt := cSt + " C> ,<CCCC>''.,;,,.```---<CCCCCCCCCCCCCCCC <$$$$$$$$$$$' $$$$$$$$$$$$$$c " + CR
cSt := cSt + " CCCCCC>'.;<CCCCCCCCCC;;,, `'''<CCCC>>>''',J$$$$$$$$$' :, ?$$$$$$$$$$$$$ " + CR
cSt := cSt + " CCCCC ,<CCCCCCCCCCCCCCC' z$$$cc,`' ,$c=$$$$$$$$$$?$' ::`: '$$$$$$$$$$$$c, " + CR
cSt := cSt + " CCCCCCCCCCCCCCCCCCCCCC ,J$$$$$$$$$c,' .',??$$$$$$c `: .::. '$$$$$$$$$$$$ " + CR
cSt := cSt + " CCCCCCCCCCCCCCCCCCCCC z$$$$$$$$$$$$$CC;,`,, $$$$$$ ..::'..::. '$$$$$$$$$C " + CR
cSt := cSt + " CCCCCCCCCCCCCCCCCCCCC $$$$$$$$$$$$$$$$$CCcc,, '?$F .....:::... `?$$$$$$$>c " + CR
cSt := cSt + " CCCCCCCCCCCCCCCCCCCCC ?$$??$$$$$$$$$$$$$$$C'?$hc ``:::': ``'``. '?$$$$$$$ " + CR
cSt := cSt + " CCCCCCCCCCCCCCCCCCCCC> '??<$$$$$$$$$$$$$$$$$c,`?<> :..` ...`.::: J$$$$$$$$ " + CR
cSt := cSt + " CCCCCCCCCCCC>>>>''''..,;, `'?$$$$$$$$$$$$F'?$$h.`?.`:: .:::'`,J$$$$$$P'' " + CR
cSt := cSt + " `'''' .-;> `'!' <!'`.,;!;, '??$$$$.`'?$h.`?$$h. .`:'.. . ,$$$$$P''.: ` " + CR
cSt := cSt + " !!,;, `<' - ``,;<!!'' ,;;;;,''?$$c,`?$$. '?$$.` :'' : P;J$$P .::' ` " + CR
cSt := cSt + " !!!!!>;,`' .>',, `,;<!!! ;,-`.',!'''- '?$h.`?$h. '?$h. .'.: `'''. :..:::: " + CR
cSt := cSt + " !!!!!!' ./'`.>',;!!!..' `!''`'.,;;;!!''- '== '?$c '?$r .:::':'' `''` .. " + CR
cSt := cSt + " !!!!' .< ,;!' <!!!!!!' ``,;;!!!'``.,;;;!!,,,.,..`.,..,..,.. ,;;;!!!! " + CR
cSt := cSt + " !!' ;!' ;'`,;!'' ;-',;!!!!!!;;!!!!!!!!!!!''''''''''''`!!!!!!!;;!!!!!!!! " + CR
cSt := cSt + " ' .<' ;!' <!!! ,'' ' ,;!!!!!!!!!!!!!!!!!'`.,;;;;;;;;!!!;;;,.```!!!!!!!!!!! " + CR
DEFINE WINDOW Form_1 ;
AT 90,90 ;
WIDTH 510 ;
HEIGHT 940 ;
TITLE "Finestra di Giovanni" ;
MAIN
END WINDOW
@ 10,10 EDITBOX editor ;
PARENT Form_1 ;
WIDTH 490 ;
HEIGHT 920 ;
FONT "courier new" SIZE 6 ;
BOLD ITALIC ;
BACKCOLOR {0,0,0} ;
FONTCOLOR {0,255,255} ;
VALUE cSt
ACTIVATE WINDOW Form_1
RETURN NIL
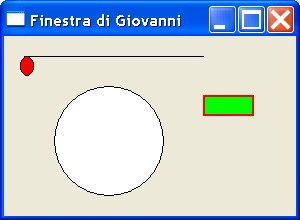
DRAWING - Drawing
The following example shows how to draw with primitives, like circles and lines.
#include "hmg.ch"
FUNCTION Main()
DEFINE WINDOW Form_1 ;
AT 90,90 ;
WIDTH 300 ;
HEIGHT 220 ;
TITLE "Finestra di Giovanni" ;
MAIN
END WINDOW
DRAW ELLIPSE IN WINDOW Form_1 AT 50,50 TO 160,160
DRAW ELLIPSE IN WINDOW Form_1 AT 40,30 TO 20,16 FILLCOLOR {255,0,0}
DRAW LINE IN WINDOW Form_1 AT 20,20 TO 20,200
DRAW RECTANGLE IN WINDOW Form_1 AT 60,200 TO 80,250 PENCOLOR {255,0,0} PENWIDTH 2 FILLCOLOR {0,255,0}
ACTIVATE WINDOW Form_1
RETURN NIL
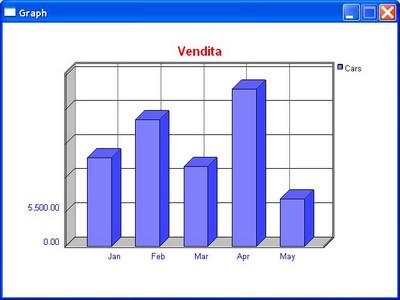
DRAWING - Drawing a Bar Graph
The following example shows how to draw a Bars Graph.
#include "hmg.ch"
Procedure Main()
Local aSer:={ { 14280, 20420, 12870, 25347, 7640 } }
Define Window GraphTest ;
At 0,0 ;
Width 640 ;
Height 480 ;
Title "Graph" ;
Main ;
Nomaximize ;
On Init DrawBarGraph ( aSer ) ;
BackColor { 255 , 255 , 255 }
End Window
GraphTest.Center
Activate Window GraphTest
Return
Procedure DrawBarGraph ( aSer )
ERASE WINDOW GraphTest
DRAW GRAPH ;
IN WINDOW GraphTest ;
AT 20,20 ;
TO 400,610 ;
TITLE "Vendita" ;
TYPE BARS ;
SERIES aSer ;
YVALUES { "Jan", "Feb", "Mar", "Apr","May" } ;
DEPTH 15 ;
BARWIDTH 15 ;
HVALUES 5 ;
SERIENAMES { "Cars" } ;
COLORS { { 128, 128, 255 } } ;
3DVIEW ;
SHOWGRID ;
SHOWXVALUES ;
SHOWYVALUES ;
SHOWLEGENDS ;
NOBORDER
Return
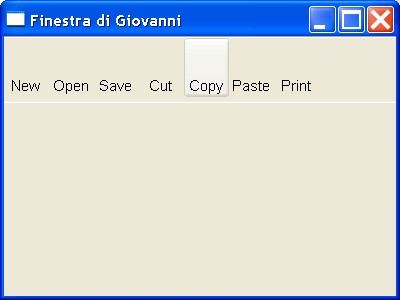
TOOLBAR - A simple textual Tool Bar
This example shows how to create a simple Tool Bar, without icons.
#include "hmg.ch"
FUNCTION Main()
DEFINE WINDOW Form_1 ;
AT 90,90 ;
WIDTH 400 ;
HEIGHT 300 ;
TITLE "Finestra di Giovanni" ;
MAIN
END WINDOW
DEFINE TOOLBAR tb ;
PARENT Form_1 ;
BUTTONWIDTH 50 ;
BUTTONHEIGHT 50 ;
BORDER .T.
TOOLBUTTON b1 CAPTION "New"
TOOLBUTTON b2 CAPTION "Open"
TOOLBUTTON b3 CAPTION "Save"
TOOLBUTTON b4 CAPTION "Cut"
TOOLBUTTON b5 CAPTION "Copy"
TOOLBUTTON b6 CAPTION "Paste"
TOOLBUTTON b7 CAPTION "Print"
END TOOLBAR
ACTIVATE WINDOW Form_1
RETURN NIL
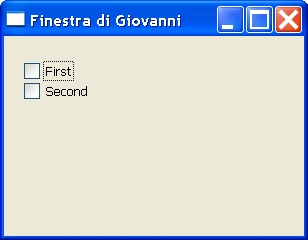
CHECKBOX - Simple checkboxes
This example shows how to create checkboxes.
#include "hmg.ch"
FUNCTION Main()
DEFINE WINDOW Form_1 ;
AT 90,90 ;
WIDTH 300 ;
HEIGHT 200 ;
TITLE "Finestra di Giovanni" ;
MAIN
END WINDOW
@ 20,20 CHECKBOX cb1 ;
PARENT Form_1 ;
CAPTION "First"
@ 50,20 CHECKBOX cb2 ;
PARENT Form_1 ;
CAPTION "Second"
ACTIVATE WINDOW Form_1
RETURN NIL
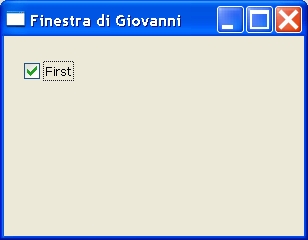
CHECKBOX - How to set a checkbox
This example shows how to set a checkbox.
#include "hmg.ch"
FUNCTION Main()
DEFINE WINDOW Form_1 ;
AT 90,90 ;
WIDTH 300 ;
HEIGHT 200 ;
TITLE "Finestra di Giovanni" ;
MAIN
END WINDOW
@ 20,20 CHECKBOX cb1 ;
PARENT Form_1 ;
CAPTION "First" ;
VALUE .T.
ACTIVATE WINDOW Form_1
RETURN NIL
TIMEPICKER - Adding a TimePicker
This example shows how to create a TimePicker.
#INCLUDE "hmg.ch"
FUNCTION Main()
DEFINE WINDOW Form_1 ;
AT 90,90 ;
WIDTH 300 ;
HEIGHT 200 ;
TITLE "Finestra di Giovanni" ;
MAIN
END WINDOW
@ 10,10 TIMEPICKER tp PARENT Form_1
Form_1.Activate
RETURN NIL
RESOURCES - Image in EXE
This example shows how to include an image in the .EXE file, so you have not need it.
You have to create a file of resources (.rc). Specify it on your project file.
Compile with "build sample.hbp"
=================================== THIS IS THE FILE PROVA.HBP ===================================
-w3
prova.rc
prova.prg
=================================== THIS IS THE FILE PROVA.RC ===================================
ResImgJPG JPG cavallo.jpg
// ResImgBMP BITMAP img.BMP
// ResImgGIF GIF img.GIF
// ResImgTIF TIF img.TIF
// ResImgPNG PNG img.PNG
// ResImgWMF WMF img.WMF
// ResImgICO ICO img.ICO
// ResImgCUR CUR img.CUR
=================================== THIS IS THE FILE PROVA.PRG ===================================
#include "hmg.ch"
Procedure Main()
Define Window Form_1 ;
At 50,50 ;
Width 400 ;
Height 400 ;
Title "Giovanni" ;
Main
End Window
@ 10,10 IMAGE foto ;
PARENT Form_1 ;
PICTURE "ResImgJPG" ;
WIDTH 287 ;
HEIGHT 260 ;
Activate Window Form_1
Return
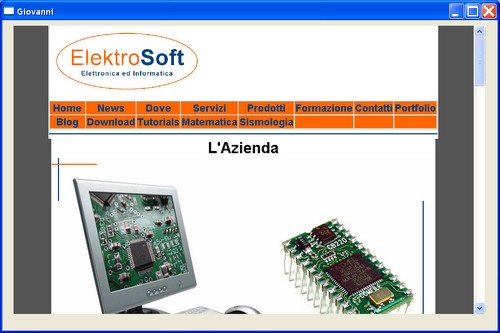
ACTIVEX - Viewing a Web page
This example shows how to create a Web viewer, by an ActiveX.
#include "hmg.ch"
FUNCTION Main()
DEFINE WINDOW Form_1 ;
AT 0,0 ;
WIDTH 900 ;
HEIGHT 600 ;
TITLE "Giovanni" ;
MAIN
END WINDOW
@ 10,20 ACTIVEX Test ;
PARENT Form_1 ;
WIDTH 850 ;
HEIGHT 520 ;
PROGID "shell.explorer.2"
Form_1.Test.Object:Navigate("www.elektrosoft.it")
Activate Window Form_1
RETURN NIL
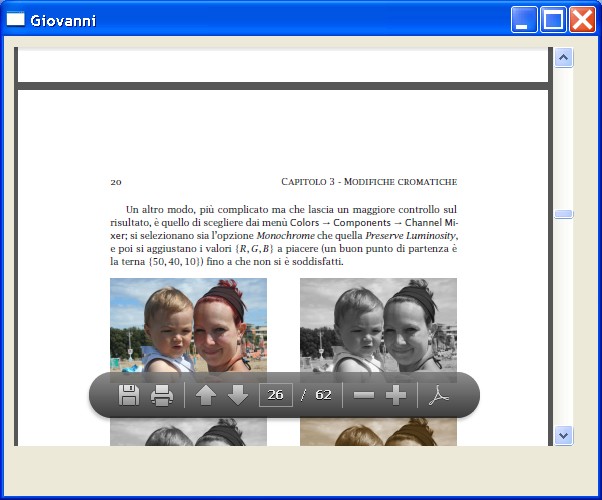
ACTIVEX - Viewing a PDF document
This example shows how to view a PDF document, by an ActiveX.
#include "hmg.ch"
FUNCTION Main()
DEFINE WINDOW Form_1 ;
AT 0,0 ;
WIDTH 600 ;
HEIGHT 500 ;
TITLE "Giovanni" ;
MAIN
END WINDOW
@ 10,10 ACTIVEX Test ;
PARENT Form_1 ;
WIDTH 560 ;
HEIGHT 400 ;
PROGID "AcroPDF.PDF.1"
Form_1.Test.Object:src := GetCurrentFolder() + "\" + "prova.pdf"
Activate Window Form_1
RETURN NIL
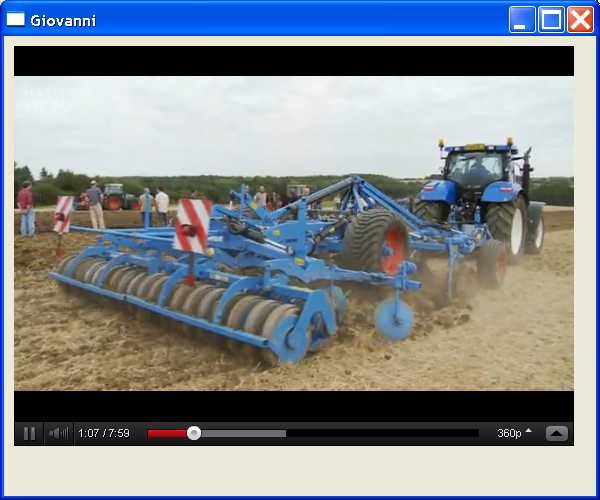
ACTIVEX - Viewing a movie from Youtube
This example shows how to view a movie (flash) from Youtube, by an ActiveX.
#include "hmg.ch"
FUNCTION Main()
DEFINE WINDOW Form_1 ;
AT 0,0 ;
WIDTH 600 ;
HEIGHT 500 ;
TITLE "Giovanni" ;
MAIN
END WINDOW
@ 10,10 ACTIVEX Test ;
PARENT Form_1 ;
WIDTH 560 ;
HEIGHT 400 ;
PROGID "ShockwaveFlash.ShockwaveFlash.9"
Form_1.Test.Object:Movie := "http://www.youtube.com/v/B43JyTSknl0"
Activate Window Form_1
RETURN NIL
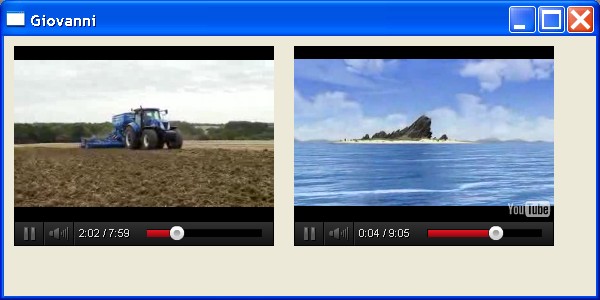
ACTIVEX - Viewing two movies from Youtube
This example shows how to view two movies (flash) from Youtube, by an ActiveX.
#include "hmg.ch"
FUNCTION Main()
DEFINE WINDOW Form_1 ;
AT 0,0 ;
WIDTH 600 ;
HEIGHT 300 ;
TITLE "Giovanni" ;
MAIN
END WINDOW
@ 10,10 ACTIVEX Test1 ;
PARENT Form_1 ;
WIDTH 260 ;
HEIGHT 200 ;
PROGID "ShockwaveFlash.ShockwaveFlash.9"
@ 10,290 ACTIVEX Test2 ;
PARENT Form_1 ;
WIDTH 260 ;
HEIGHT 200 ;
PROGID "ShockwaveFlash.ShockwaveFlash.9"
Form_1.Test1.Object:Movie := "http://www.youtube.com/v/B43JyTSknl0"
Form_1.Test2.Object:Movie := "http://www.youtube.com/v/sDbYCI8G0nc"
Activate Window Form_1
RETURN NIL
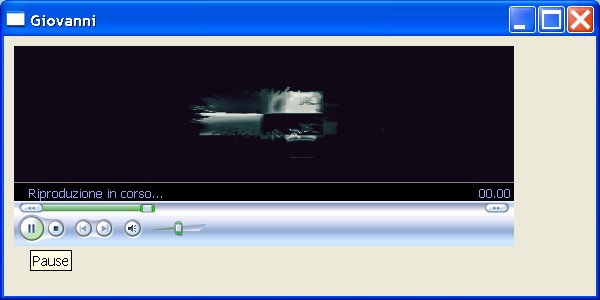
ACTIVEX - Playing a WAV file
This example shows how to play a Wav file, by an ActiveX.
#include "hmg.ch"
FUNCTION Main()
DEFINE WINDOW Form_1 ;
AT 0,0 ;
WIDTH 600 ;
HEIGHT 300 ;
TITLE "Giovanni" ;
MAIN
END WINDOW
@ 10,10 ACTIVEX Test ;
PARENT Form_1 ;
WIDTH 500 ;
HEIGHT 200 ;
PROGID "WMPlayer.OCX.7"
Form_1.Test.Object:url := "cavallo.wav"
Activate Window Form_1
RETURN NIL
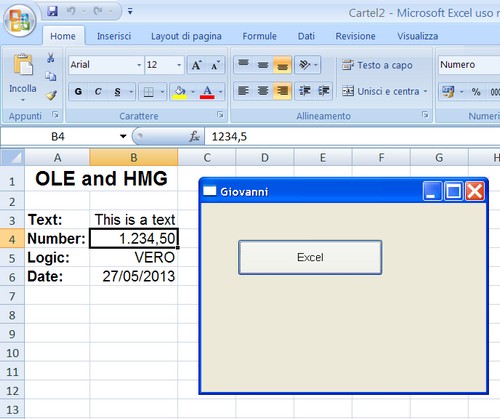
OLE - Creating an Excel document
This example shows how to create an Excel document, by OLE.
#include "hmg.ch"
FUNCTION Main()
DEFINE WINDOW Form_1 ;
AT 90,90 ;
WIDTH 400 ;
HEIGHT 300 ;
TITLE "Giovanni" ;
MAIN
END WINDOW
@ 50, 50 BUTTON button ;
PARENT Form_1 ;
CAPTION "Excel" ;
WIDTH 200 ;
HEIGHT 50 ;
ONCLICK Pressed()
Form_1.Activate
RETURN NIL
FUNCTION Pressed()
LOCAL oExcel, oSheet
oExcel := CreateObject( "Excel.Application" )
oExcel:WorkBooks:Add()
oSheet := oExcel:ActiveSheet()
oSheet:Cells:Font:Name := "Arial"
oSheet:Cells:Font:Size := 12
oSheet:Cells( 3, 1 ):Value := "Text:"
oSheet:Cells( 3, 2 ):Value := "This is a text"
oSheet:Cells( 4, 1 ):Value := "Number:"
oSheet:Cells( 4, 2 ):NumberFormat := "#.##0,00"
oSheet:Cells( 4, 2 ):Value := 1234.50
oSheet:Cells( 5, 1 ):Value := "Logic:"
oSheet:Cells( 5, 2 ):Value := .T.
oSheet:Cells( 6, 1 ):Value := "Date:"
oSheet:Cells( 6, 2 ):Value := DATE()
oSheet:Columns( 1 ):Font:Bold := .T.
oSheet:Columns( 2 ):HorizontalAlignment := -4152 // xlRight
oSheet:Columns( 1 ):AutoFit()
oSheet:Columns( 2 ):AutoFit()
oSheet:Cells( 1, 1 ):Value := "OLE and HMG"
oSheet:Cells( 1, 1 ):Font:Size := 16
oSheet:Range( "A1:B1" ):HorizontalAlignment := 7
oSheet:Cells( 4, 2 ):Select()
oExcel:Visible := .T.
RETURN NIL
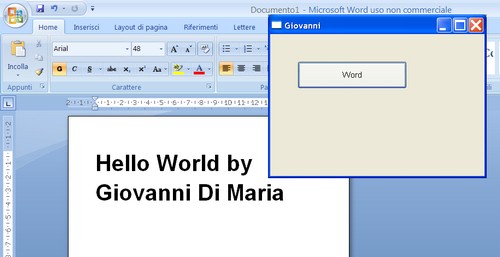
OLE - Creating a Word document
This example shows how to create a Word document, by OLE.
#include "hmg.ch"
FUNCTION Main()
DEFINE WINDOW Form_1 ;
AT 90,90 ;
WIDTH 400 ;
HEIGHT 300 ;
TITLE "Giovanni" ;
MAIN
END WINDOW
@ 50, 50 BUTTON button ;
PARENT Form_1 ;
CAPTION "Word" ;
WIDTH 200 ;
HEIGHT 50 ;
ONCLICK Pressed()
Form_1.Activate
RETURN NIL
FUNCTION Pressed()
LOCAL oWord, oText
oWord := CreateObject( "Word.Application" )
oWord:Documents:Add()
oText := oWord:Selection()
oText:Text := "Hello World by Giovanni Di Maria"
oText:Font:Name := "Arial"
oText:Font:Size := 48
oText:Font:Bold := .T.
oWord:Visible := .T.
oWord:WindowState := 1
RETURN NIL
Sample Applications - Difference between two dates
The following example calculates the difference betwee two dates. The user must type two dates
and then press the Calculate button. The program shows the difference, in days.
#include "hmg.ch"
FUNCTION Main()
SET DATE ITALIAN
DEFINE WINDOW Form_1 WIDTH 400 HEIGHT 300 TITLE "Giovanni" MAIN
END WINDOW
@ 20,90 LABEL titolo PARENT Form_1 WIDTH 240 VALUE "Difference between two dates"
@ 100,140 TEXTBOX data1 PARENT Form_1 WIDTH 110 INPUTMASK "99/99/9999"
@ 130,140 TEXTBOX data2 PARENT Form_1 WIDTH 110 INPUTMASK "99/99/9999"
@ 180,140 TEXTBOX diffe PARENT Form_1 WIDTH 110 READONLY
@ 180,270 BUTTON bottone PARENT Form_1 CAPTION "Calculate" ONCLICK calculate()
ACTIVATE WINDOW Form_1
RETURN NIL
FUNCTION calculate()
LOCAL nDifference
nDifference := Abs( CToD( Form_1.data1.value ) - CToD( Form_1.data2.value ) )
Form_1.diffe.value := AllTrim( Str(nDifference ) )
RETURN NIL
Sample Applications - Area and perimeter of a rectangle
The following example calculates the area and the perimeter of a rectangle. Input data are typed by user.
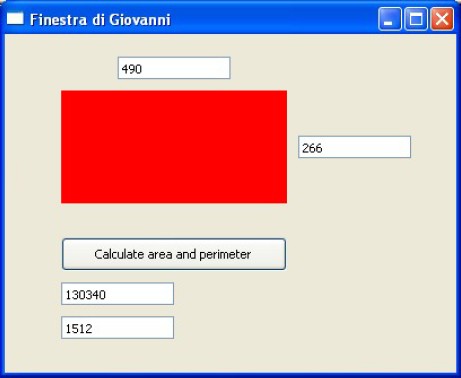
#include "hmg.ch"
FUNCTION Main()
SET DATE ITALIAN
DEFINE WINDOW Form_1 WIDTH 400 HEIGHT 400 TITLE "Finestra di Giovanni" MAIN
END WINDOW
@ 50,50 LABEL rettangolo PARENT Form_1 WIDTH 200 HEIGHT 100 BACKCOLOR {255,0,0}
@ 20,100 TEXTBOX base PARENT Form_1 WIDTH 110
@ 90,260 TEXTBOX altezza PARENT Form_1 WIDTH 110
@ 180,50 BUTTON bottone PARENT Form_1 CAPTION "Calculate area and perimeter" WIDTH 210 ONCLICK calculate()
@ 220,50 TEXTBOX area PARENT Form_1 WIDTH 110 READONLY
@ 250,50 TEXTBOX perimetro PARENT Form_1 WIDTH 110 READONLY
ACTIVATE WINDOW Form_1
RETURN NIL
FUNCTION calculate()
LOCAL nArea, nPerimeter
nArea := Val( Form_1.base.value ) * Val( Form_1.altezza.value )
nPerimeter := ( Val( Form_1.base.value ) + Val( Form_1.altezza.value ) ) * 2
Form_1.area.value := AllTrim( Str(nArea ) )
Form_1.perimetro.value := AllTrim( Str(nPerimeter ) )
RETURN NIL
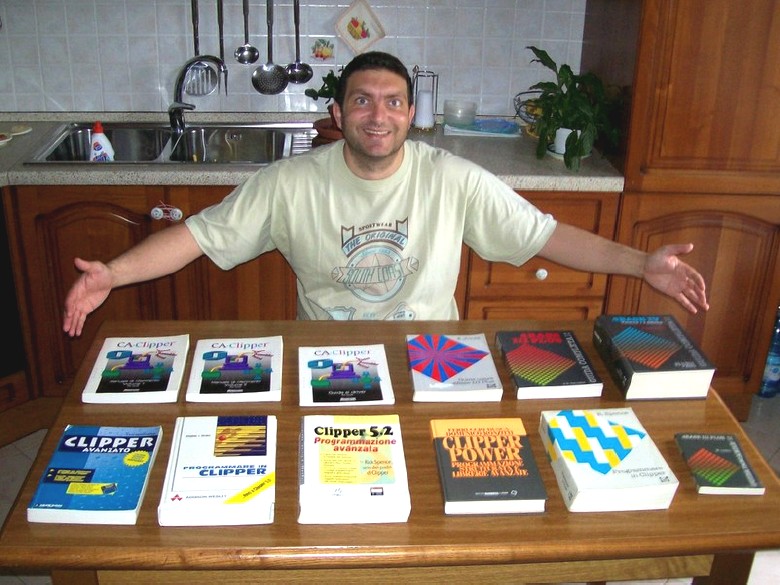
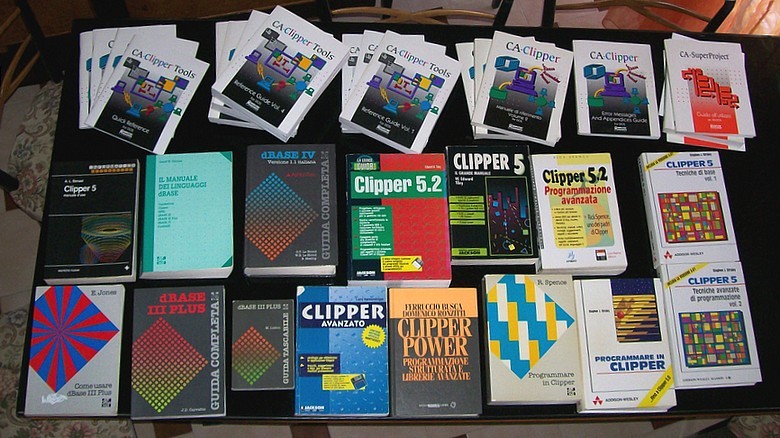
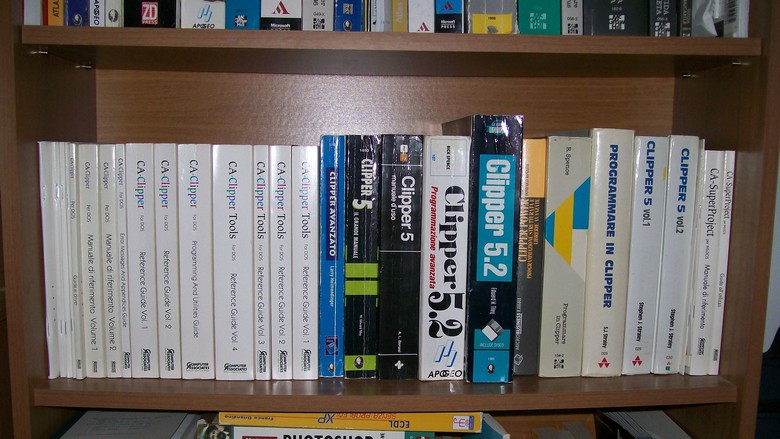
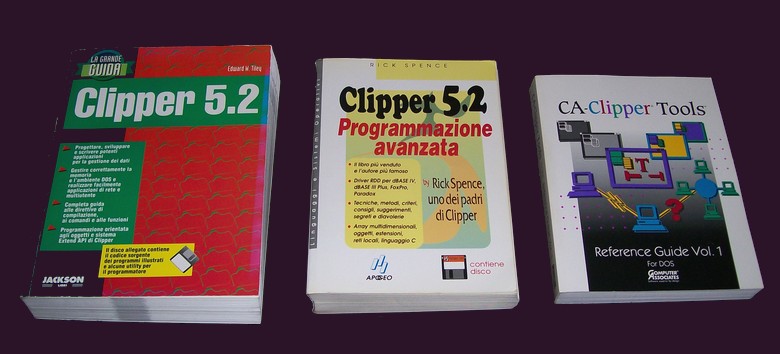
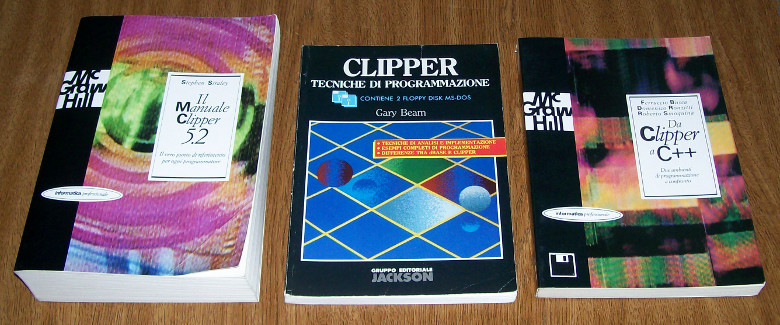
Appendix A - Photos
Appendix B - Contributors
- Giovanni Di Maria (he is still the main developer)
Appendix C - What users think
- Wow Giovanni !!! Congratulations, very nice :-) It is a great contribution to the dissemination of HMG. Best regards. (Claudio).
- It is really a wonderful and great contribution Giovanni. I am making this thread sticky so that beginners can reach the link easily. (Rathinagiri)
- GENIAL !!! (Antonio Montagut)
- Hi, Giovanni. To echo Claudio: Wow! There's some really good stuff in there -- thank you. (I wish it had been there when I started!). Thanks again. (CalScot)
- Fine work! (Mol)
- Hi Giovanni. Extremely wonderful and fantastic. I appreciate as myself and by name of community. Thanks from us to you. (Esgici)
- Buen trabajo Giovanni. Saludos desde Buenos Aires Argentina (Danielmaximiliano)
- Very nice job Giovanni ! Grande Giovanni !!! Congratulations and thank you for your contrib !!! (Pablo Cesar)
- Very good Giovanni ...! Another excellent contribution ..! Thank you. (Kardex Pyme Sofware)
- Muy bien Giovanni...! Otro aporte excelente..! Gracias. (Kardex Pyme Sofware)
- Excellent contribution to the Community Harbour, Giovanni ... Thanks! (Andres Ortiz Diaz)
- Congratulations Giovanni !!! (Fouednoomen)
- Hello Giovanni. That will be a great treasure for HMG users most especially the newbies. That one really shortens the learning curve of Clipper programmers who wishes to migrate their apps using HMG. Thanks and I really appreciate the work you have done. It's the beauty of the open source where everyone had a big heart. Congratulations! Regards, Danny. (dhaine_adp)
- Exelente aportacion... Polo. Excellent contribution ... Polo. (Leopoldo Blancas)
- Very nice job Giovanni, especially for us beginners. Thank you. Nikos (Quartz565)
- Excelente trabajo. Gracias (Agustin)
- Great work. (Antonio Montagut)
- Many Thanks for the wonderful tutorial Giovanni. Wonderful work. Greetings from Germany. (Klauskugel)
- Thanks Giovanni. Especially GRID and Resource samples are useful. Ciao. (Esgici)
- Gracias maestro Giovannii ! (Wilson Gamboa)
- Exelente Giovanni... Saludos desde México... Polo (Leopoldo Blancas)
- Fabuloso tus ejemplos Giovanni. Gracias por compartir. (Danielmaximiliano)
- Hi Giovanni, Thank you very much for the update. So tell us how many hours is your one day? It seems like your one day is more than 24 hours or you are simply having an excellent time managing skills. Well the truth is your contribution is now becomes a de facto "MUST READ DOCUMENT" aside from the official HMG Users Manual. Your straight forward approach was indeed very inspiring and certainly leads anyone who had a basic understanding of Clipper to become a fellow HMGians. God Bless you for your unselfish contributions and of course to everyone of us. Regards ,Danny. (Dhaine_adp)
- A picture is worth a thousand words !!! This is an excellent tutorial, is easy, effective and beautiful !!! What do you think about including the link to the page of the tutorial in the documentation of HMG? (Srvet_claudio)
- Exelente contribución.. Polo. (Leopoldo Blancas)
- Hermoso!!! (Fchirico)
- Wonderful. I can understand how hard is that to create a manual like this. (Rathinagiri)
- Very good work! (Chrisjx2002)
- Hi Giovanni. Thank you so much for the wonderful work. Nikos. (Quartz565)
Appendix D - Communities